
Thrift Flip: IKEA Kids Kitchen
This project I actually started and completed last year but it’s taken me awhile to put everything together! I’ve been trying to get more inspired and creative in 2022, so I will be trying to post more about my projects and creative projects that I’ve taken on.
I found this IKEA Duktig Kids Kitchen last year on Facebook Marketplace. I wanted to hunt around and find a used one to save on the cost of materials. Originally I wanted to start and finish the project with the intent to sell it, but used it instead as a way to experiment with techniques and my style.
I managed to purchase the kitchen from a family that was moving out of the country and needed it gone fast, but the kitchen was in such poor condition that I wish I’d gotten a clean new one to flip as it would have save hours of time trying to repair and prep. As great as it is to save $40 off the purchase price, it doesn’t compare to the 20+ hours of work of trying to fix things up! Here is a Step-by-Step from brainstorming, colour palettes to completion:
Brainstorming
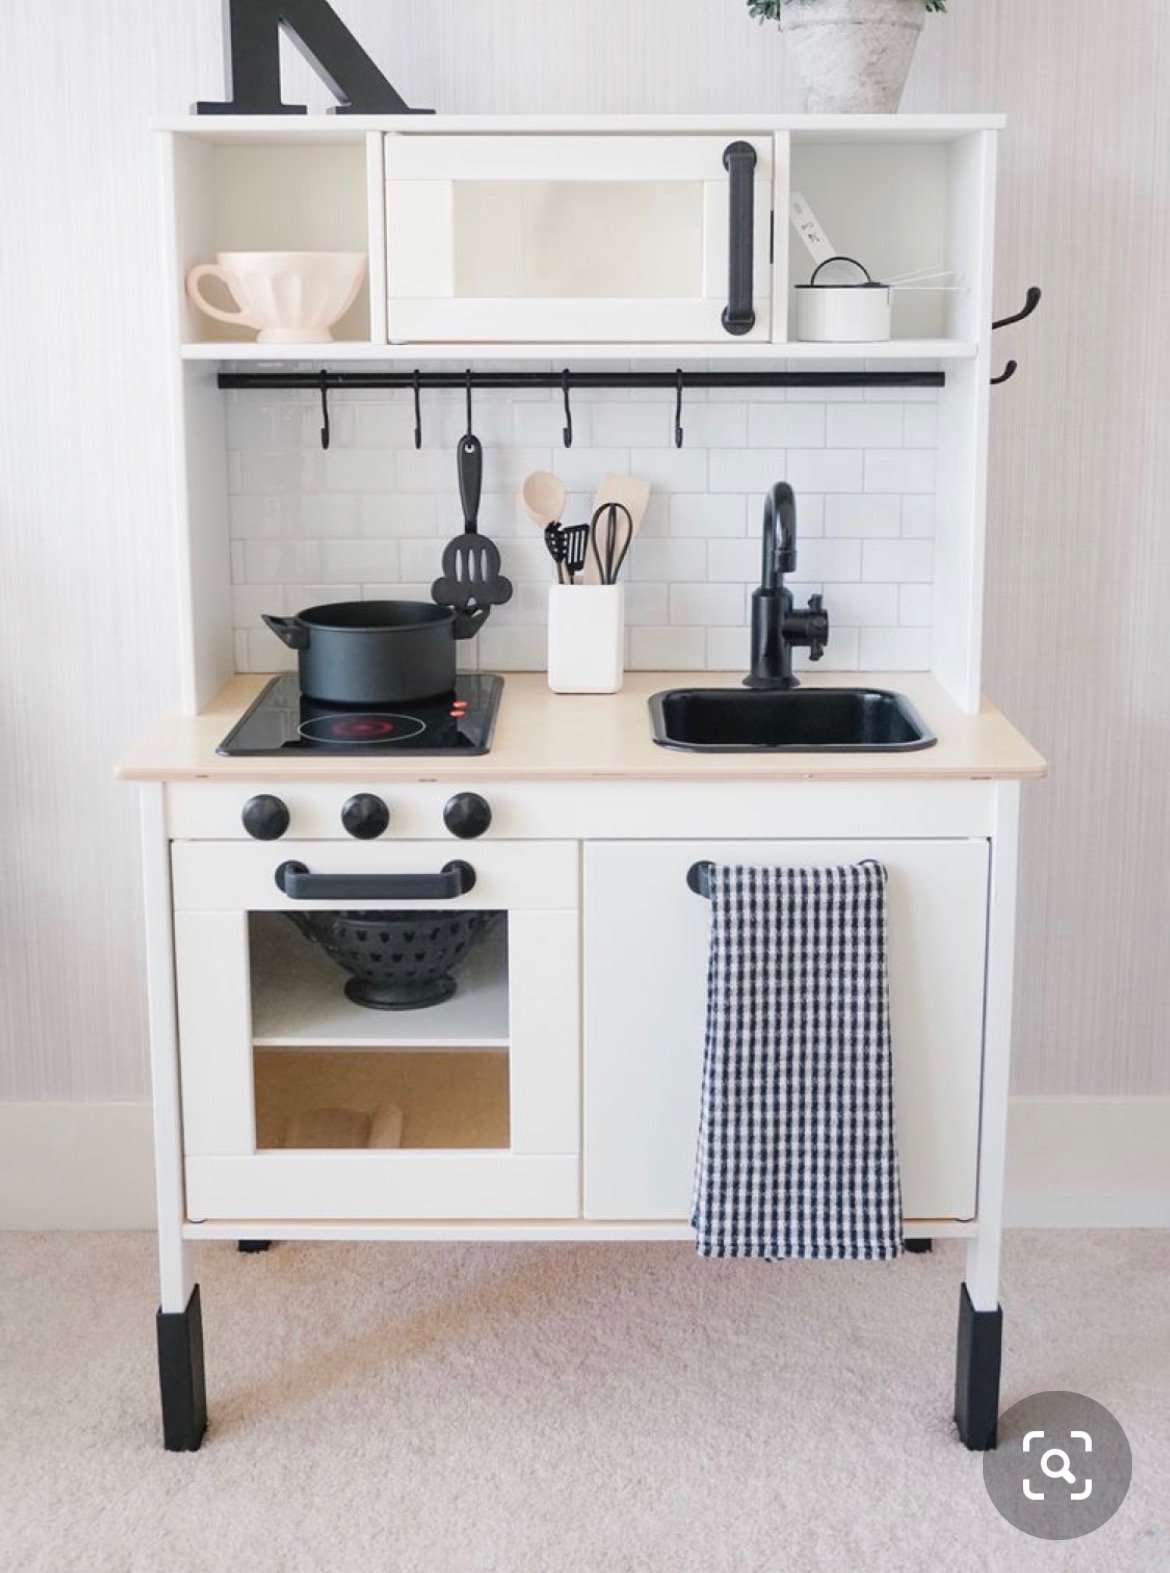
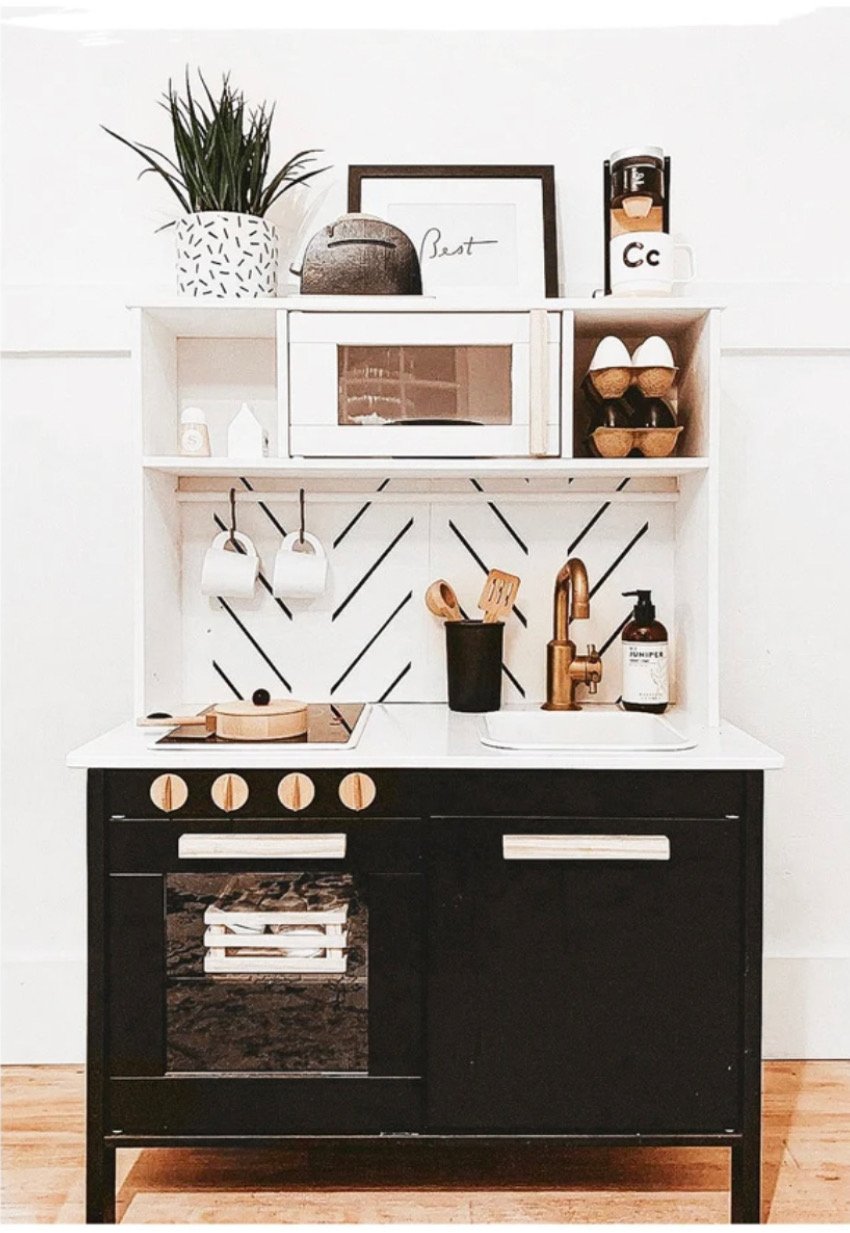
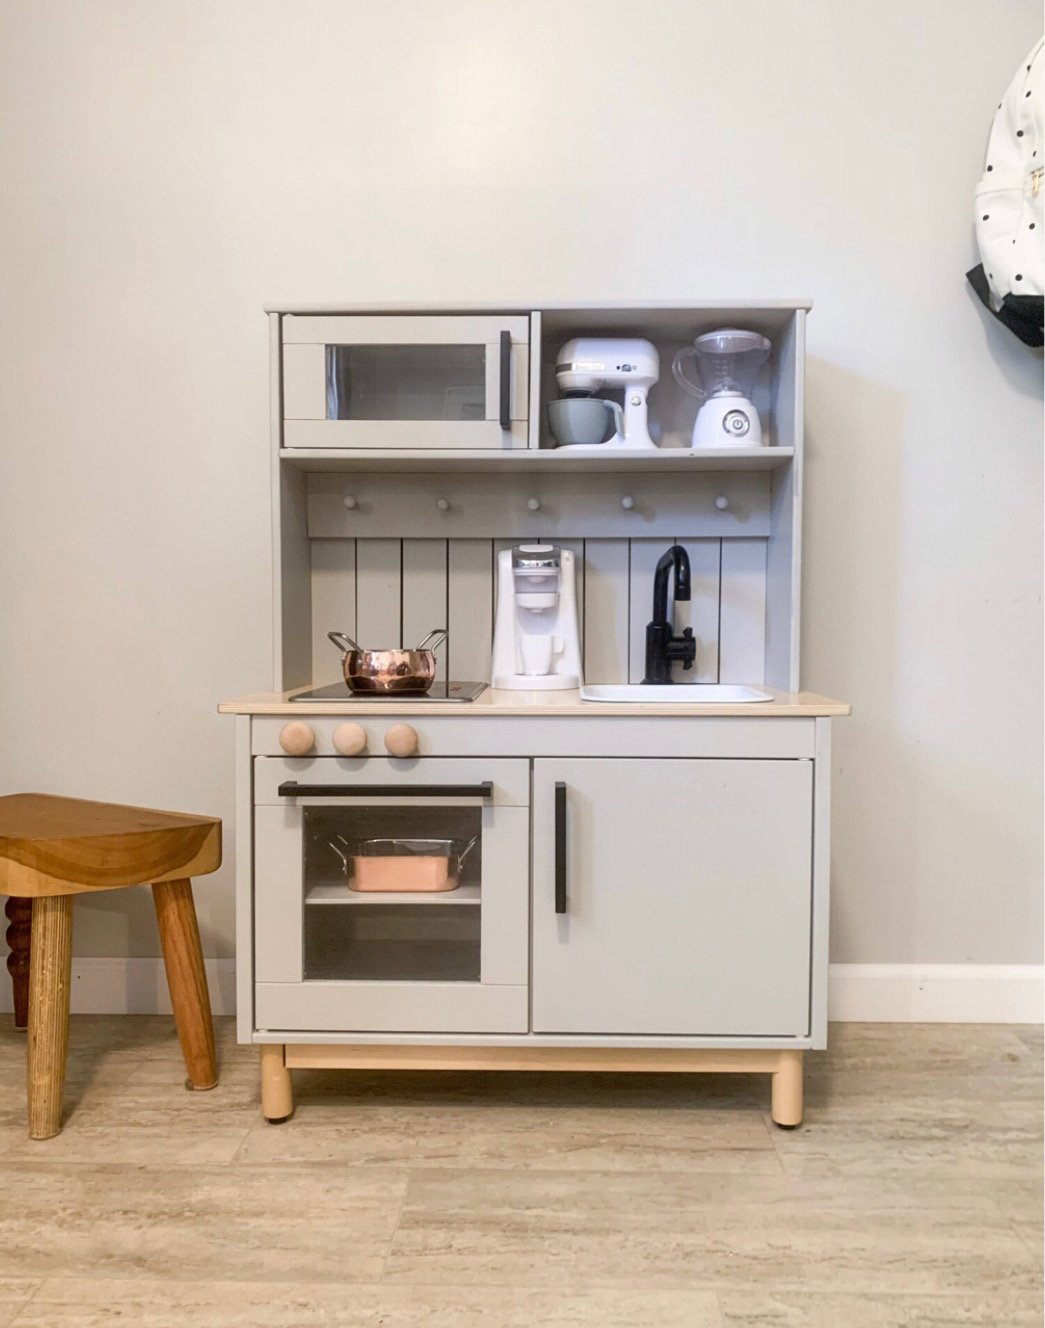
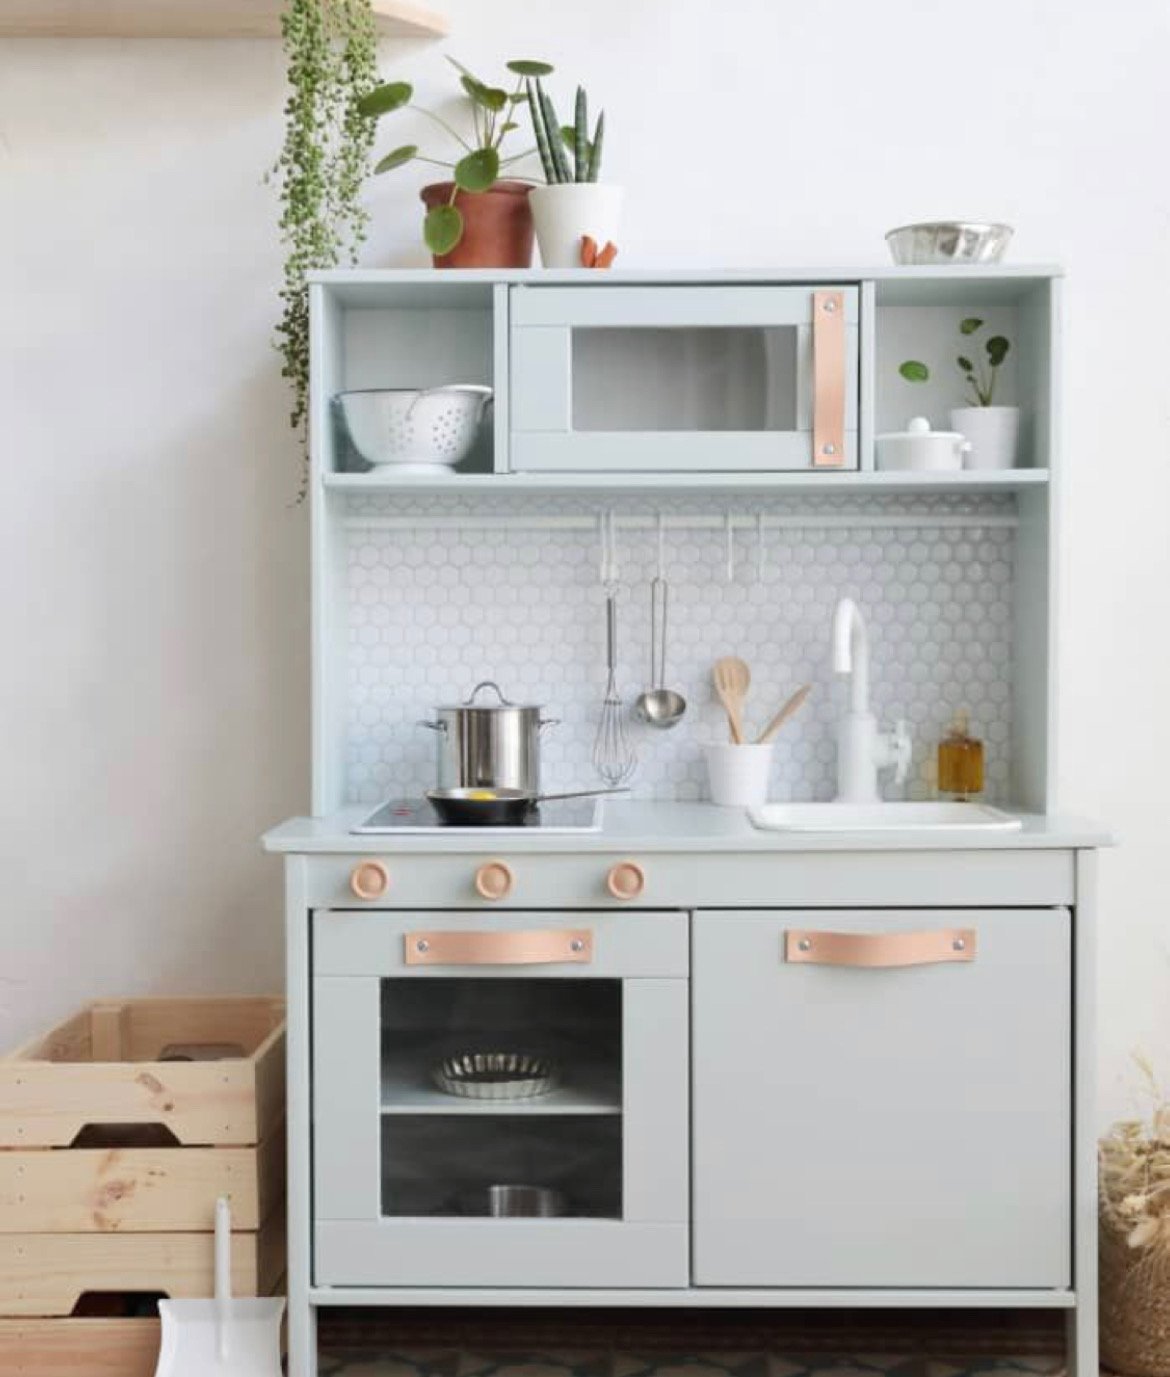
I first set out to Pin every kitchen I could fine that I loved and fit with my style. I wanted to find something that incorporated my style, but also something other people would find aesthetic since I don’t have children and I wasn’t going to be able to hold onto it.


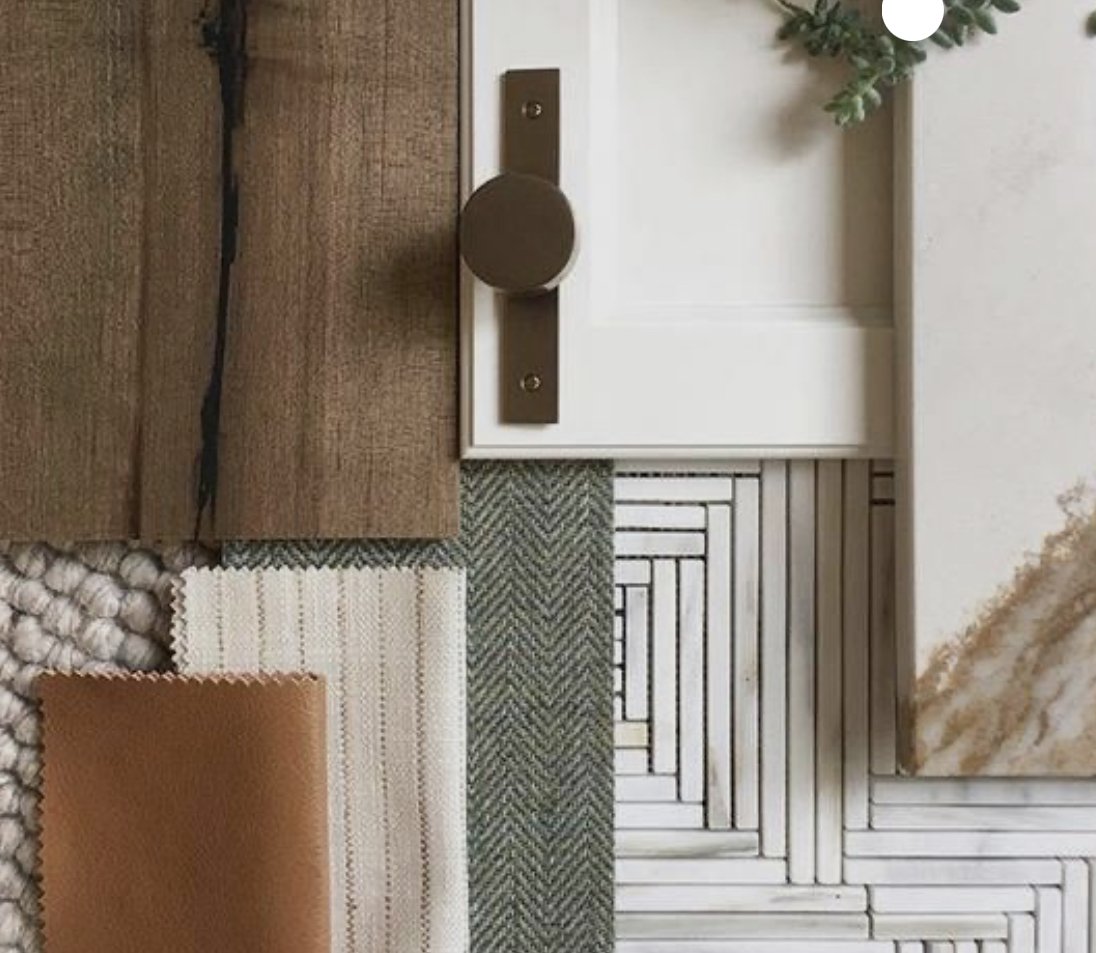
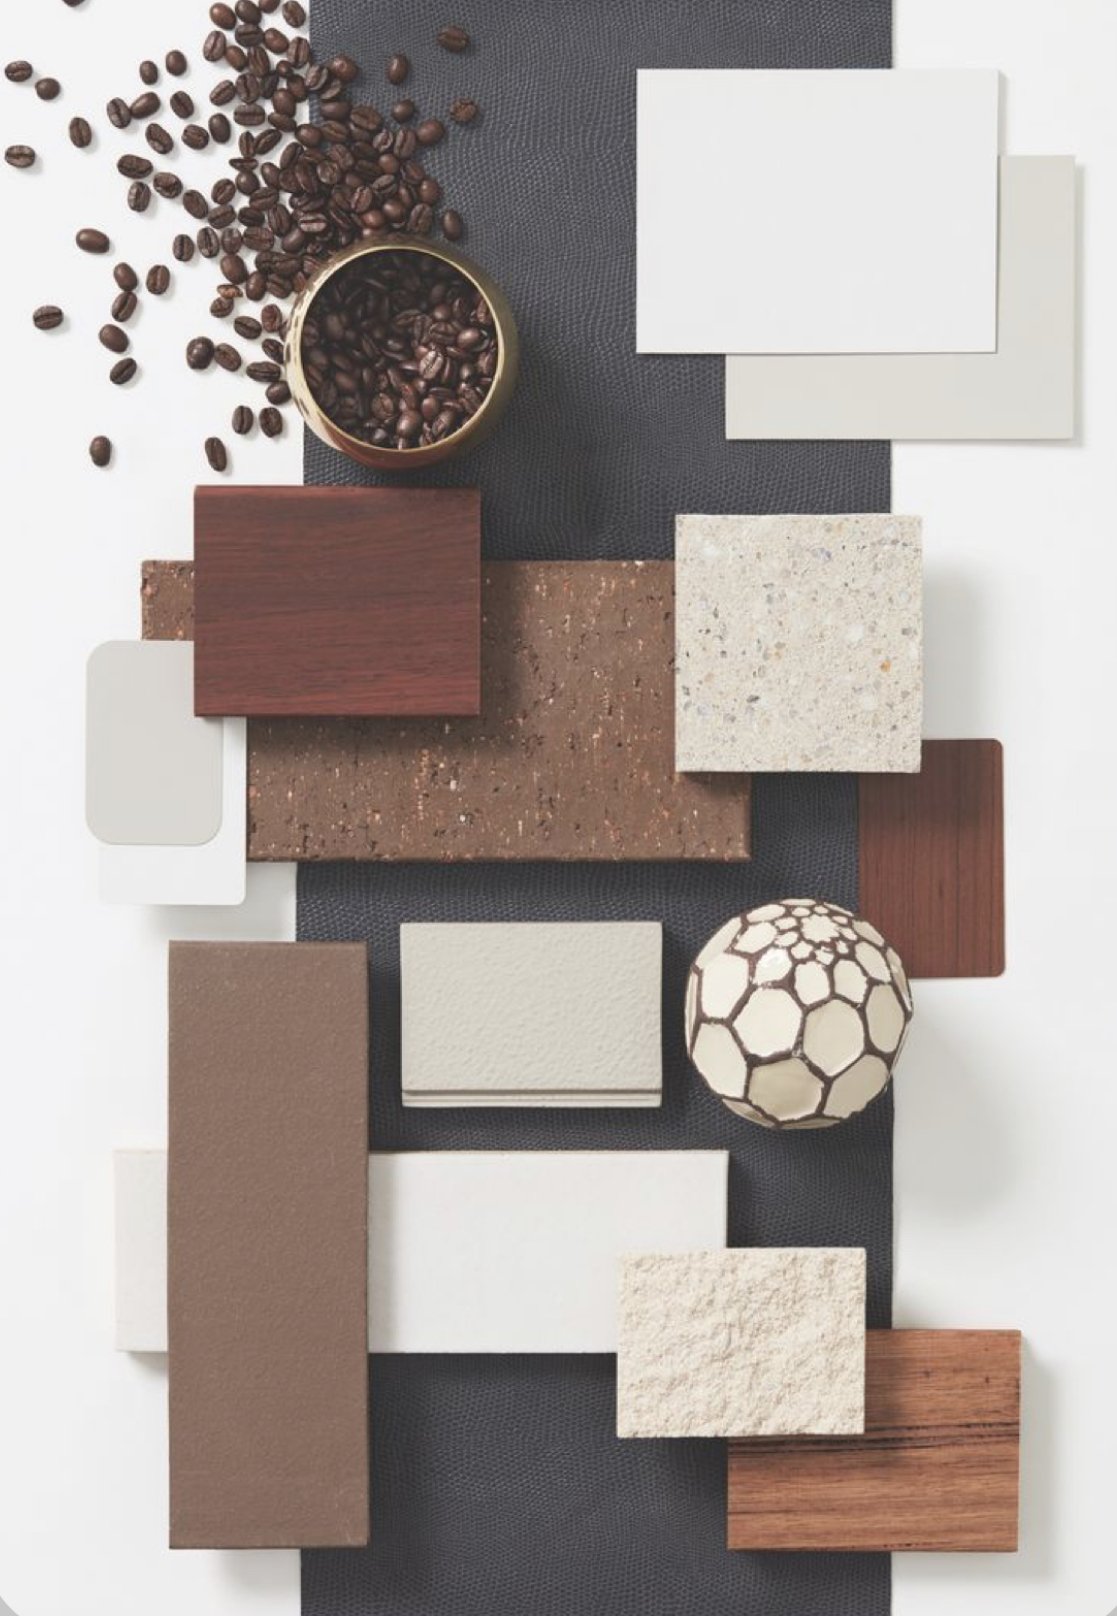
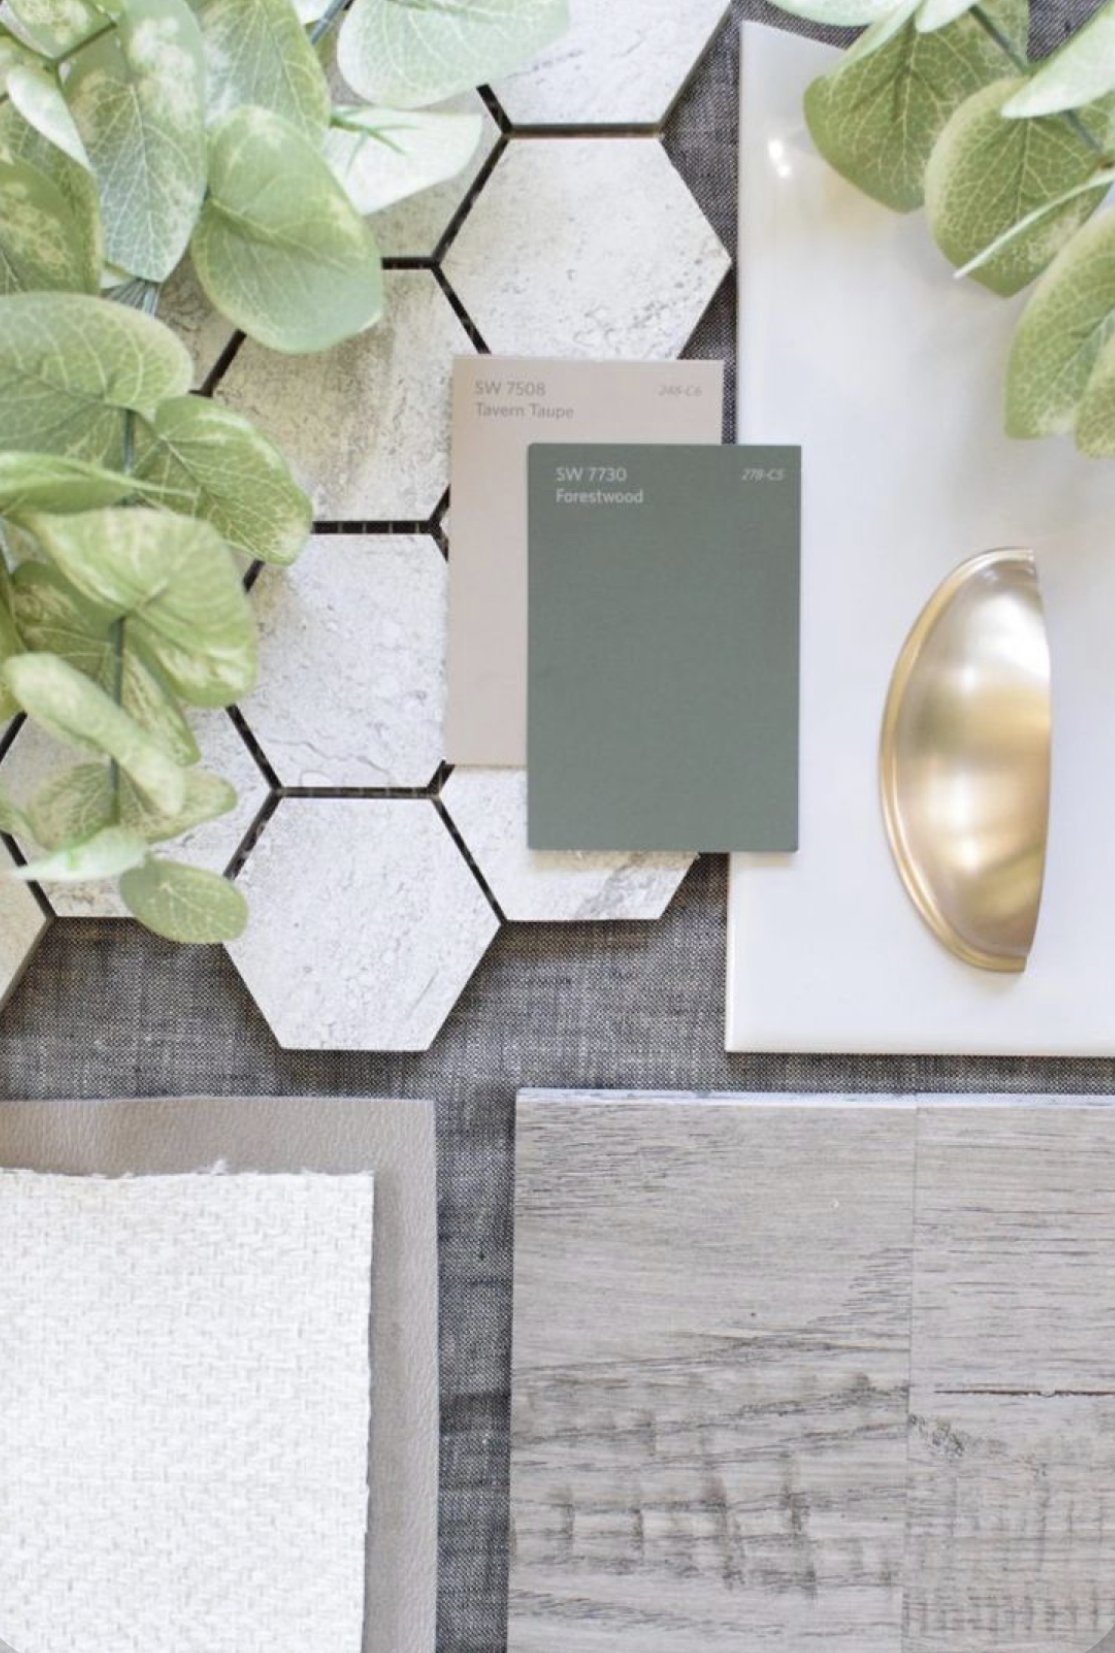
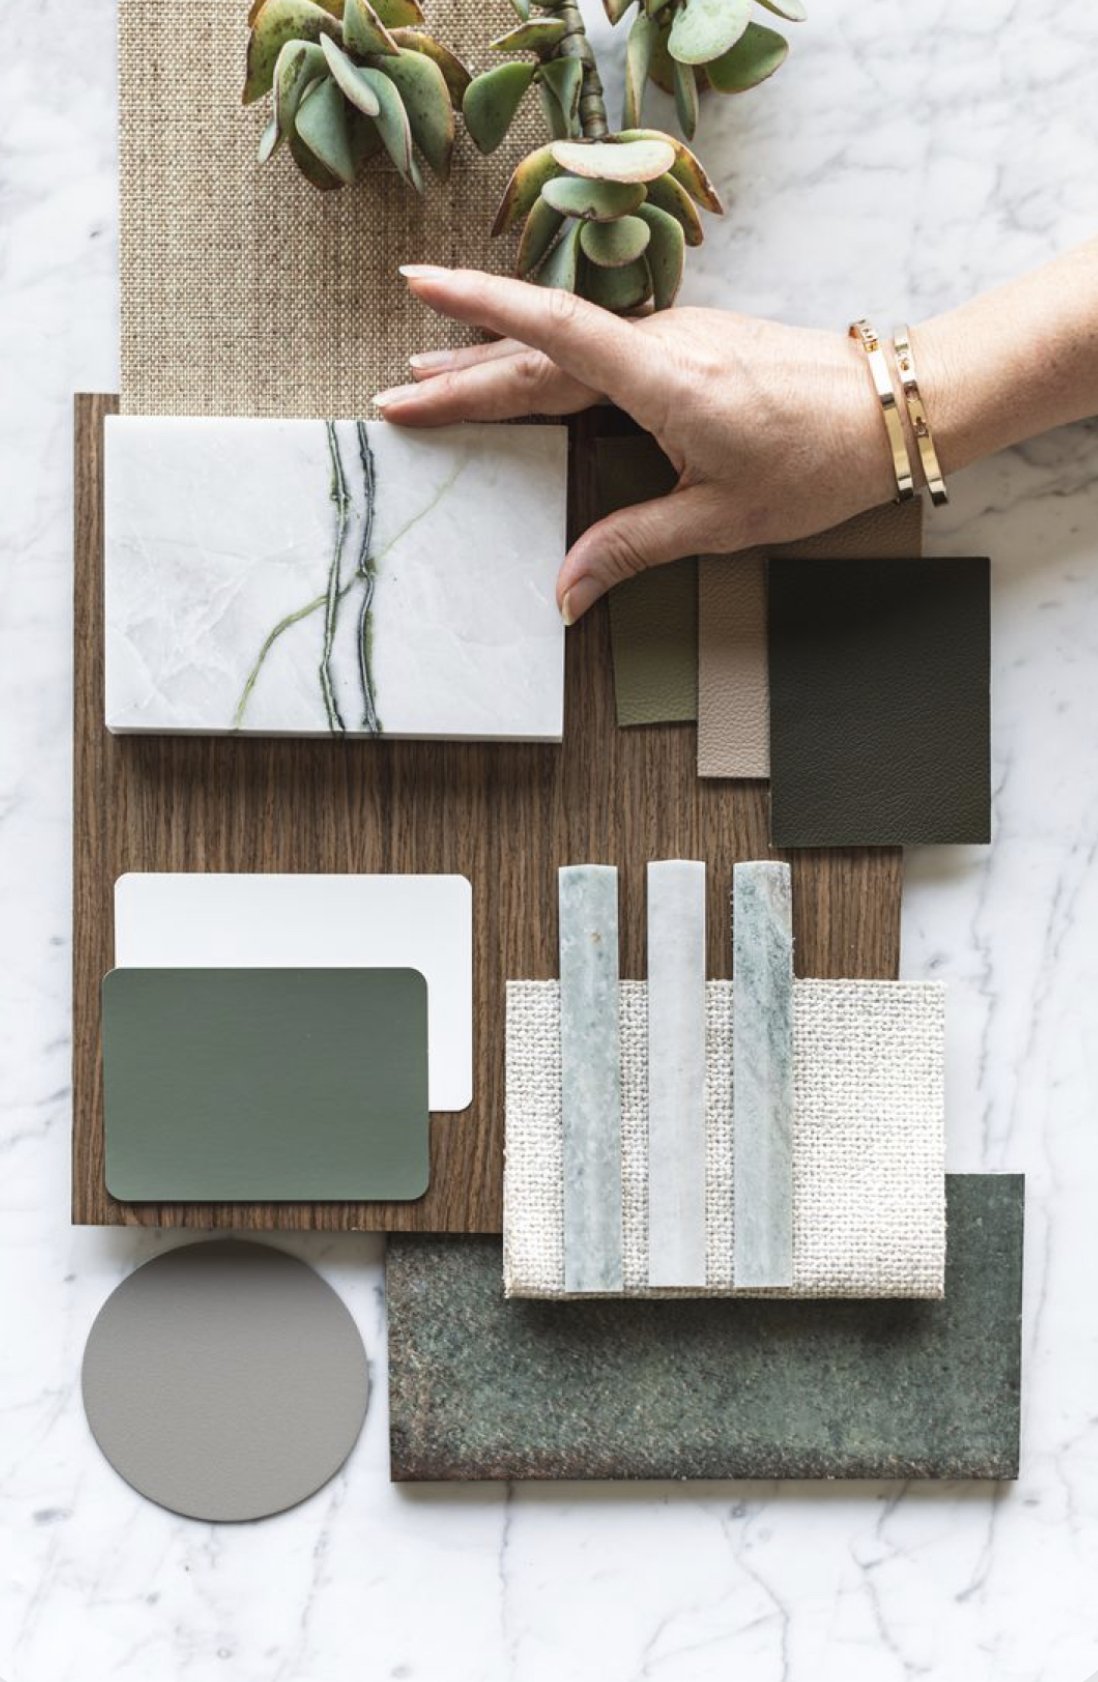
Colour Palettes
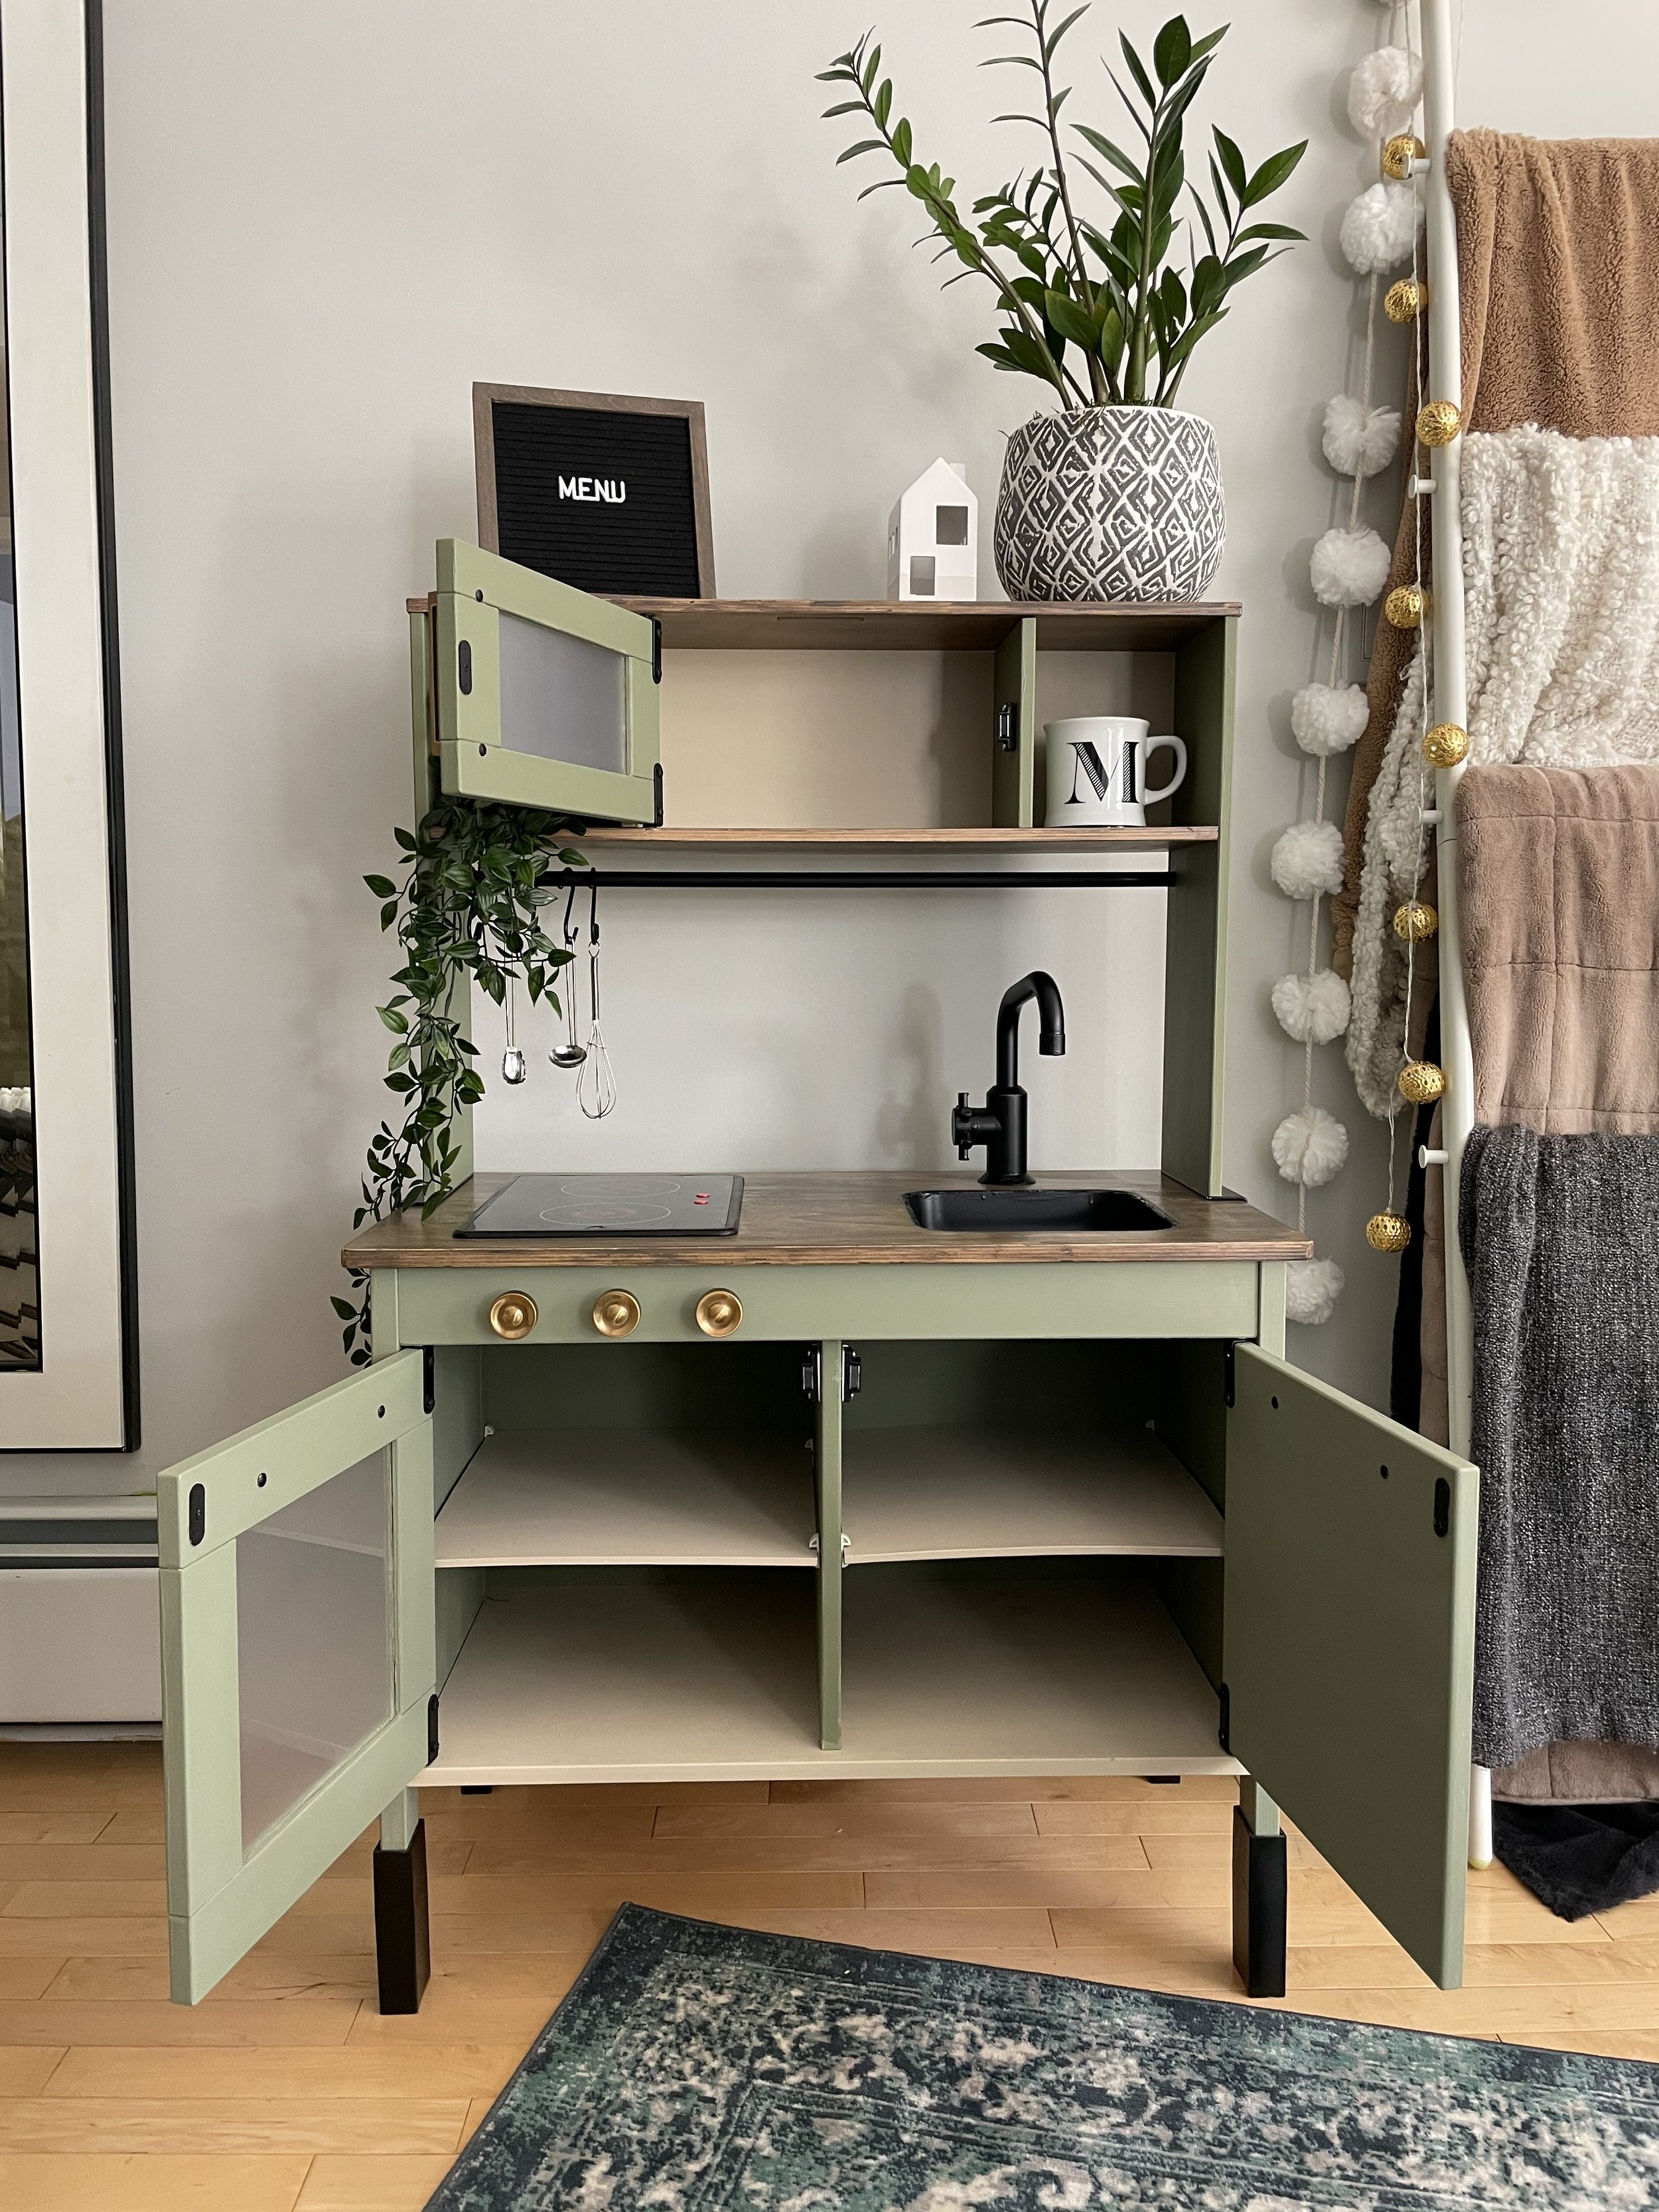
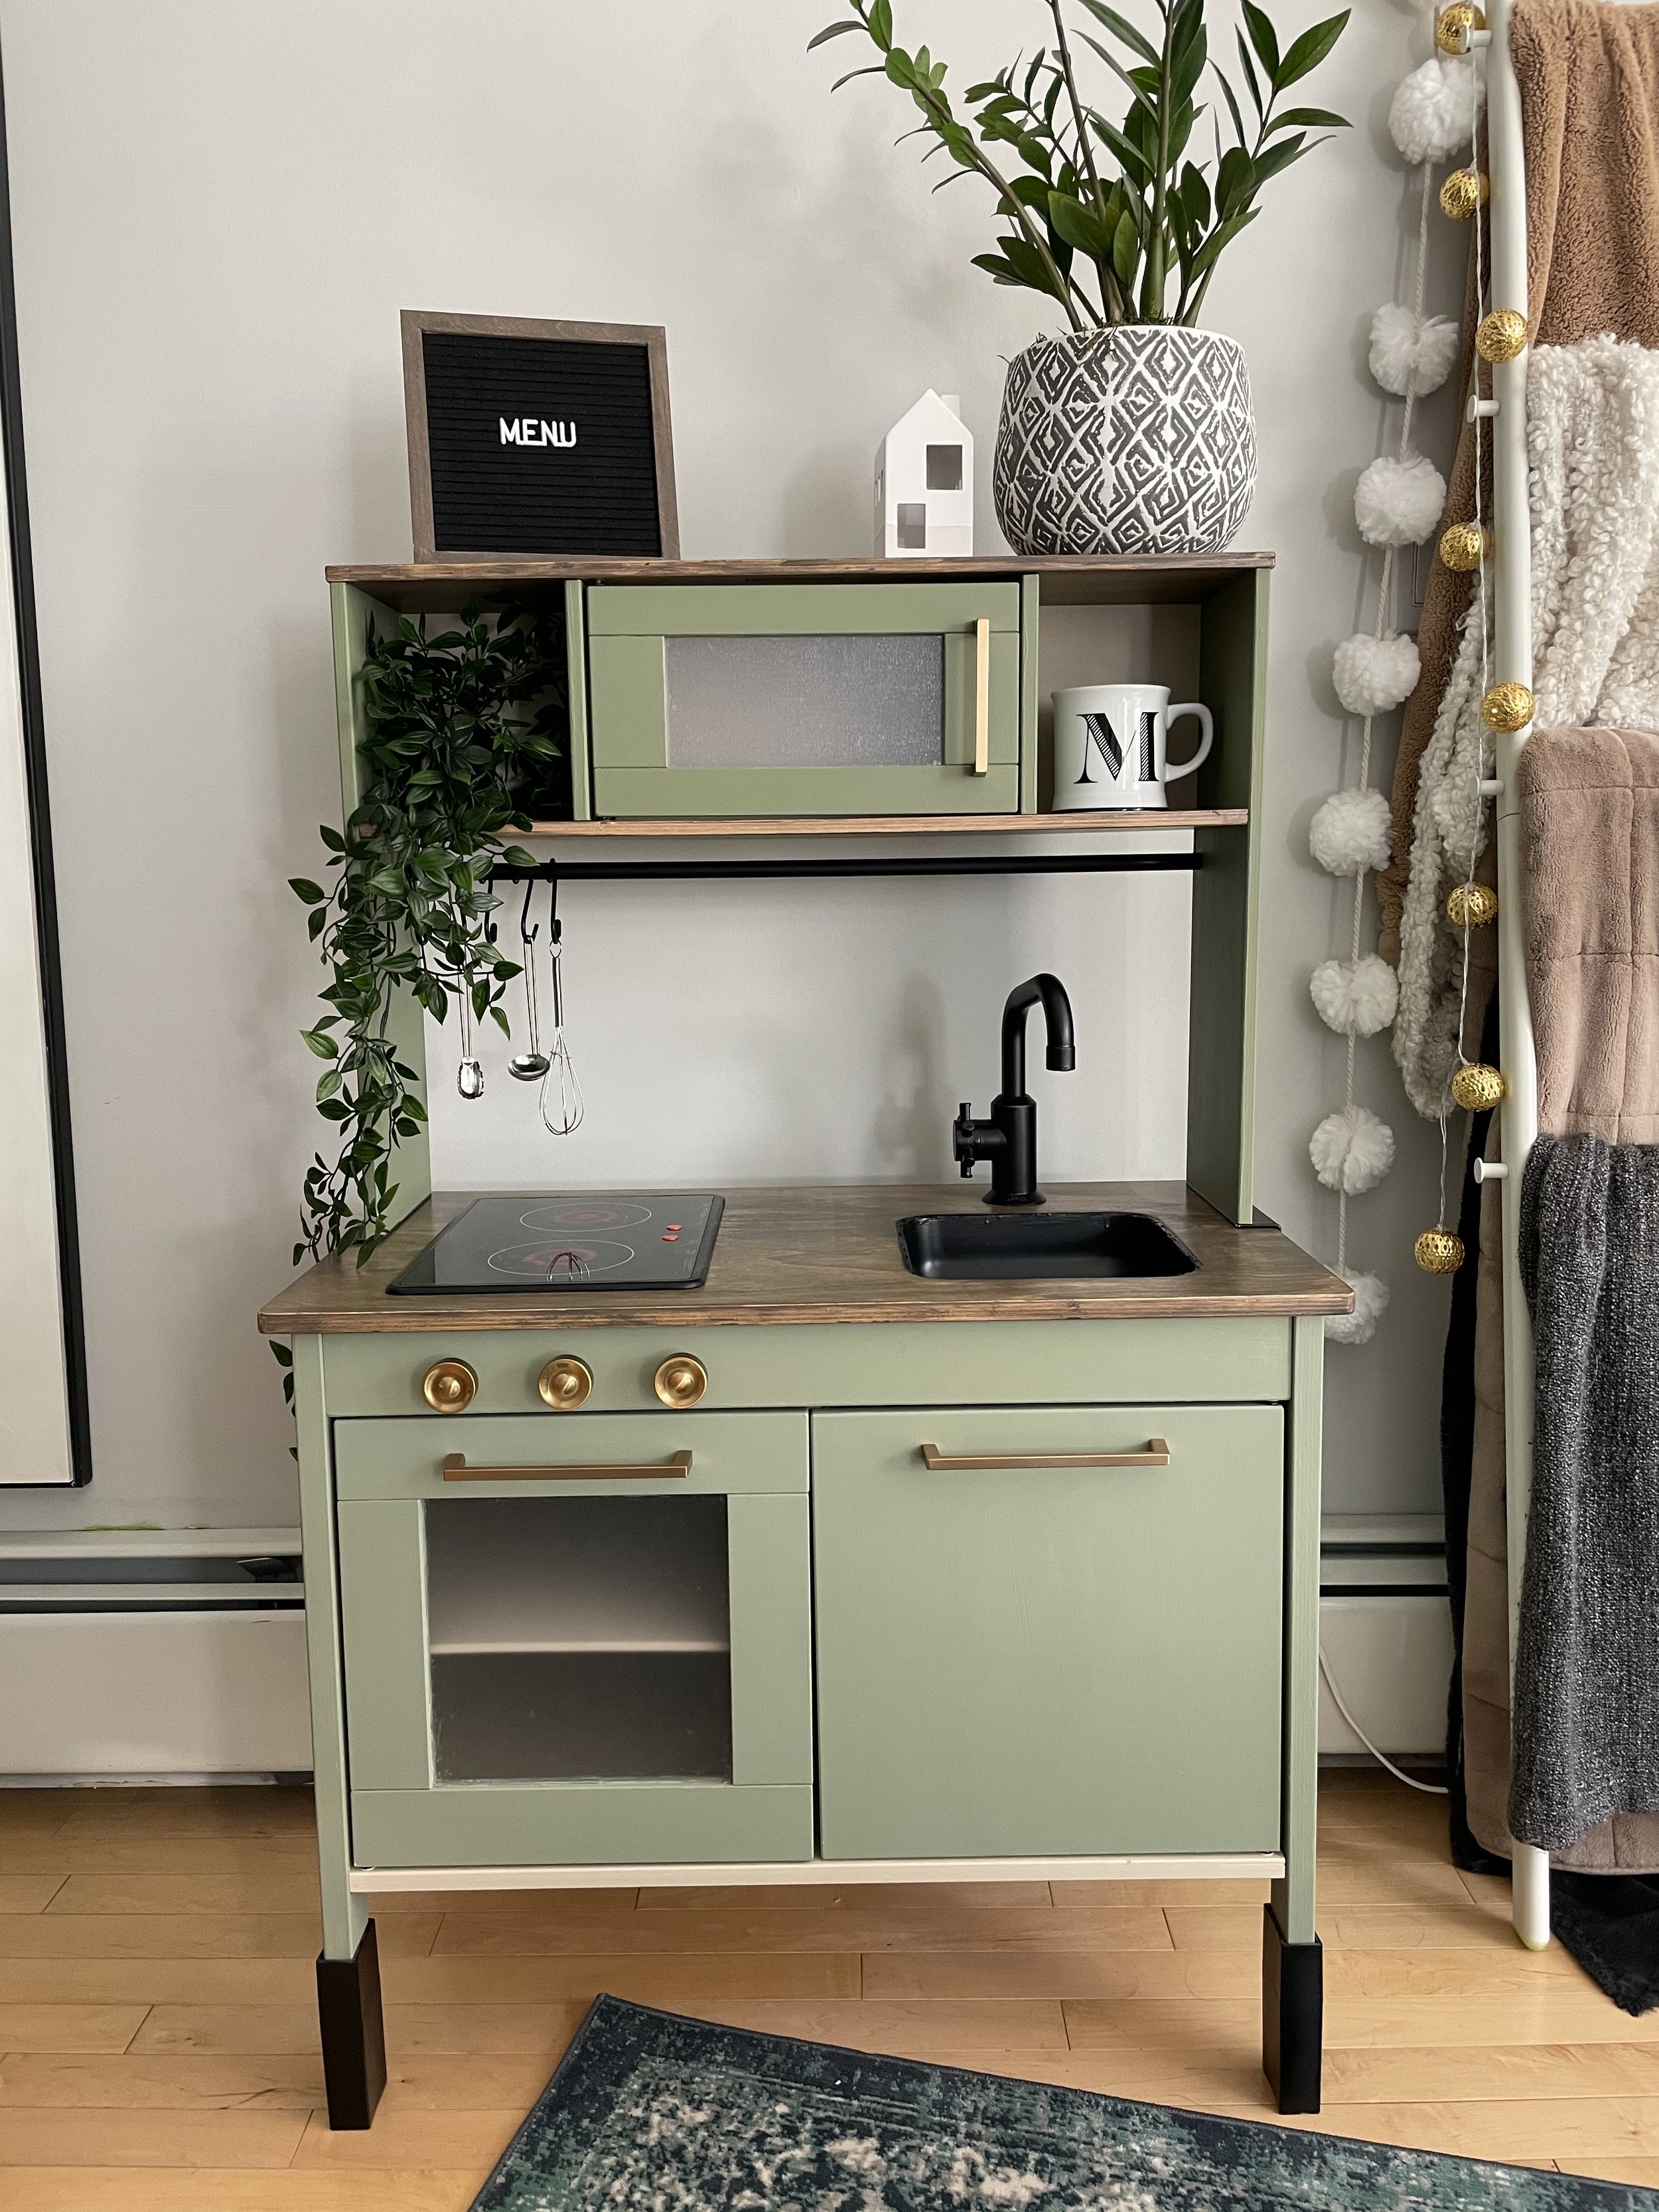
I went to my favourite resource to determine my colour palette: Instagram. I love to involve my social media friends in my decisions because I value their opinions, so I posted a handful of colour options and asked for people to vote. I got an overwhelming response to a dark neutral wood, with elements of olive and brass handles. Also, as you may know, the IKEA kitchen comes with a grey sink, and I decided to go with all of this the sink and handle needed to be painted black. I ended up combining my thoughts on a couple of the inspiration photos.
With my colour palette, I set about finding my kid kitchen and wrestling it into my little Mazda.
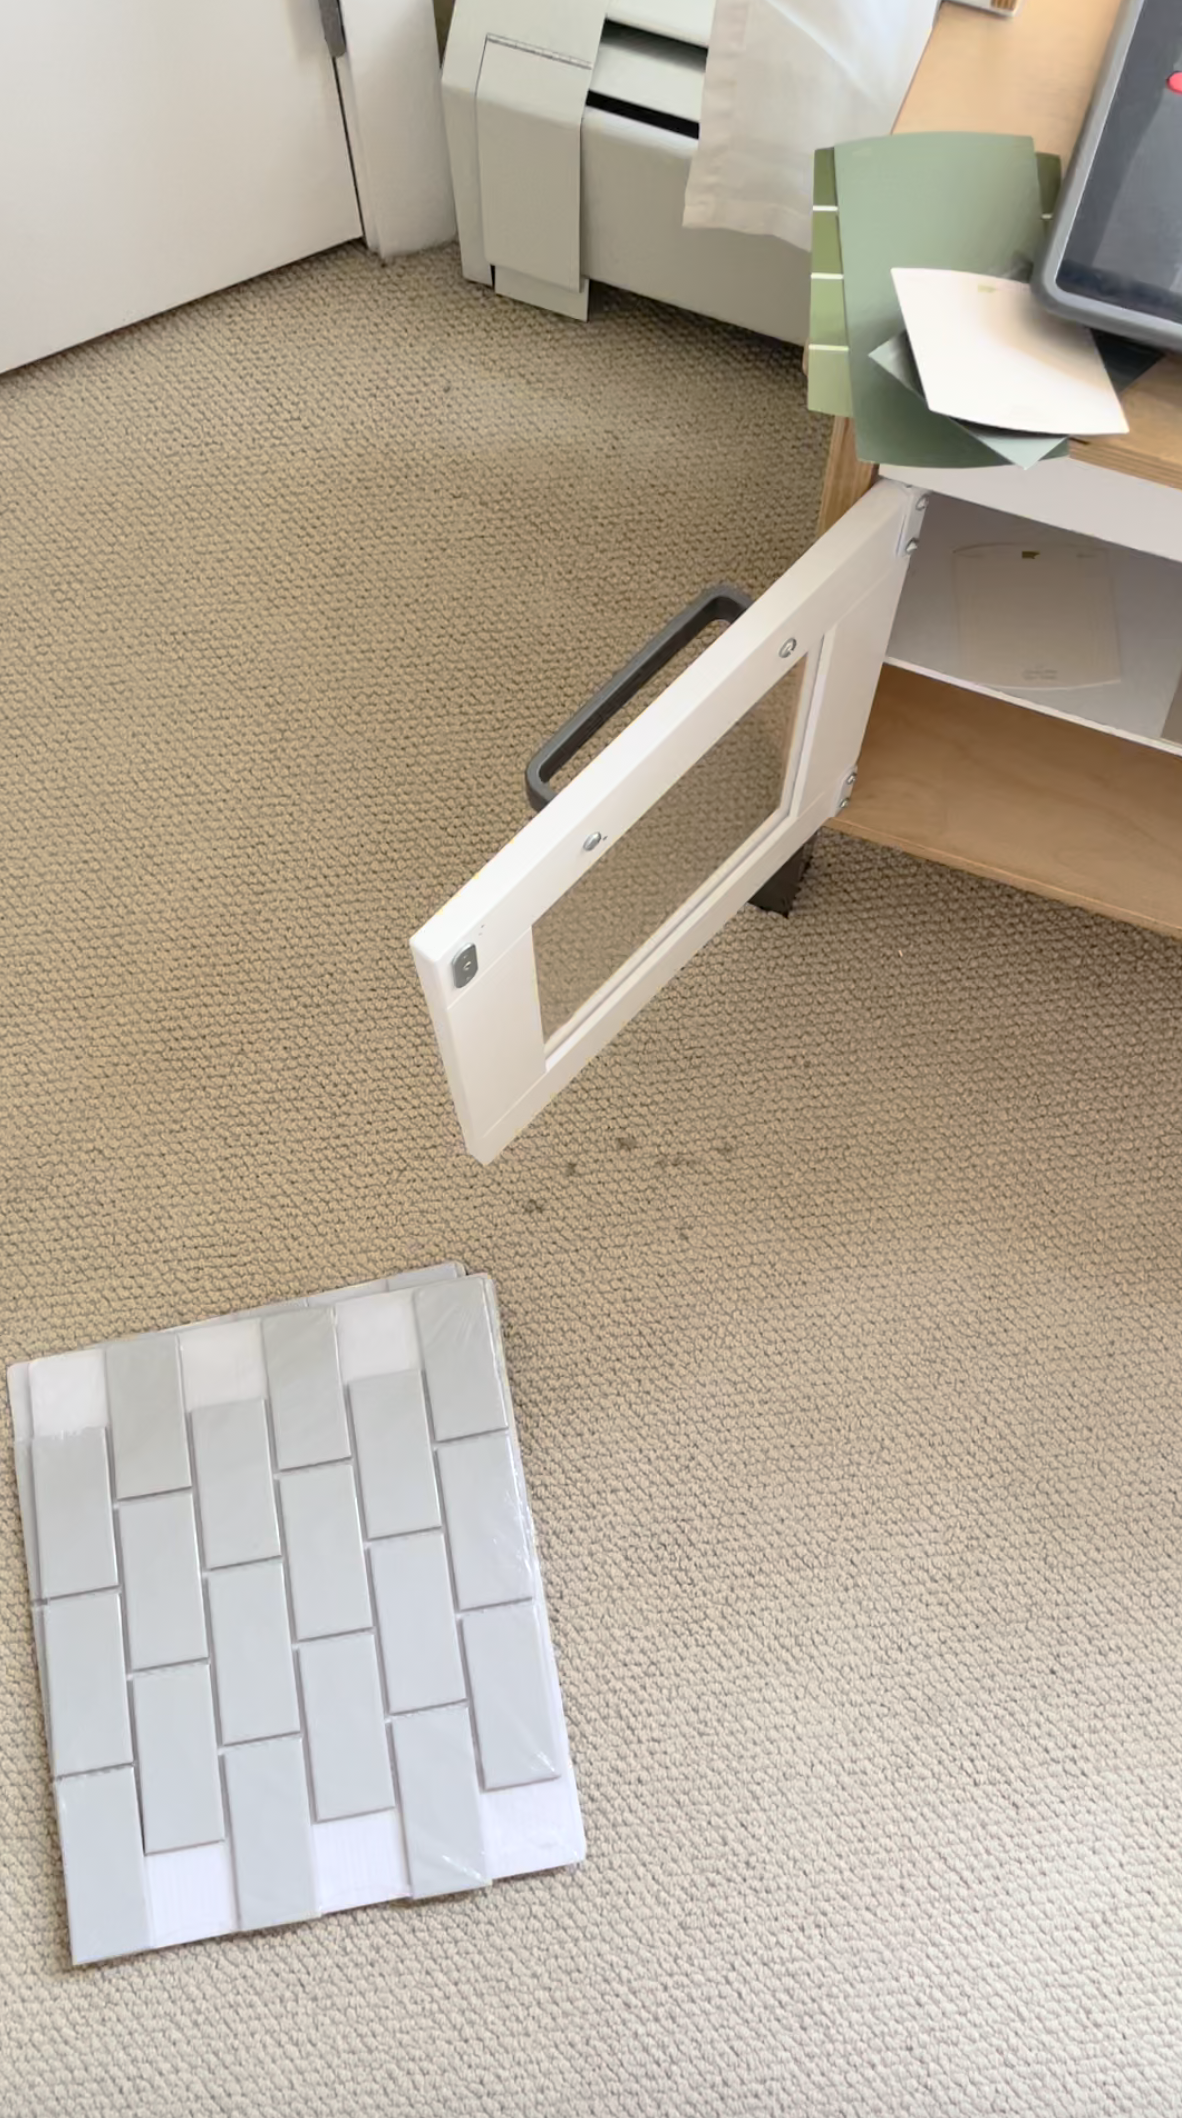
The (Used) Kitchen
As I mentioned earlier, it is my absolute recommendation that you get a new kitchen. I thought I’d be saving so much time and money by getting a used kitchen, but when I got this home, I realized there was so much work that needed to go into it.
Stickers stuck in the shelves and on the microwave
The Stove didn’t work (despite being told it would with batteries)
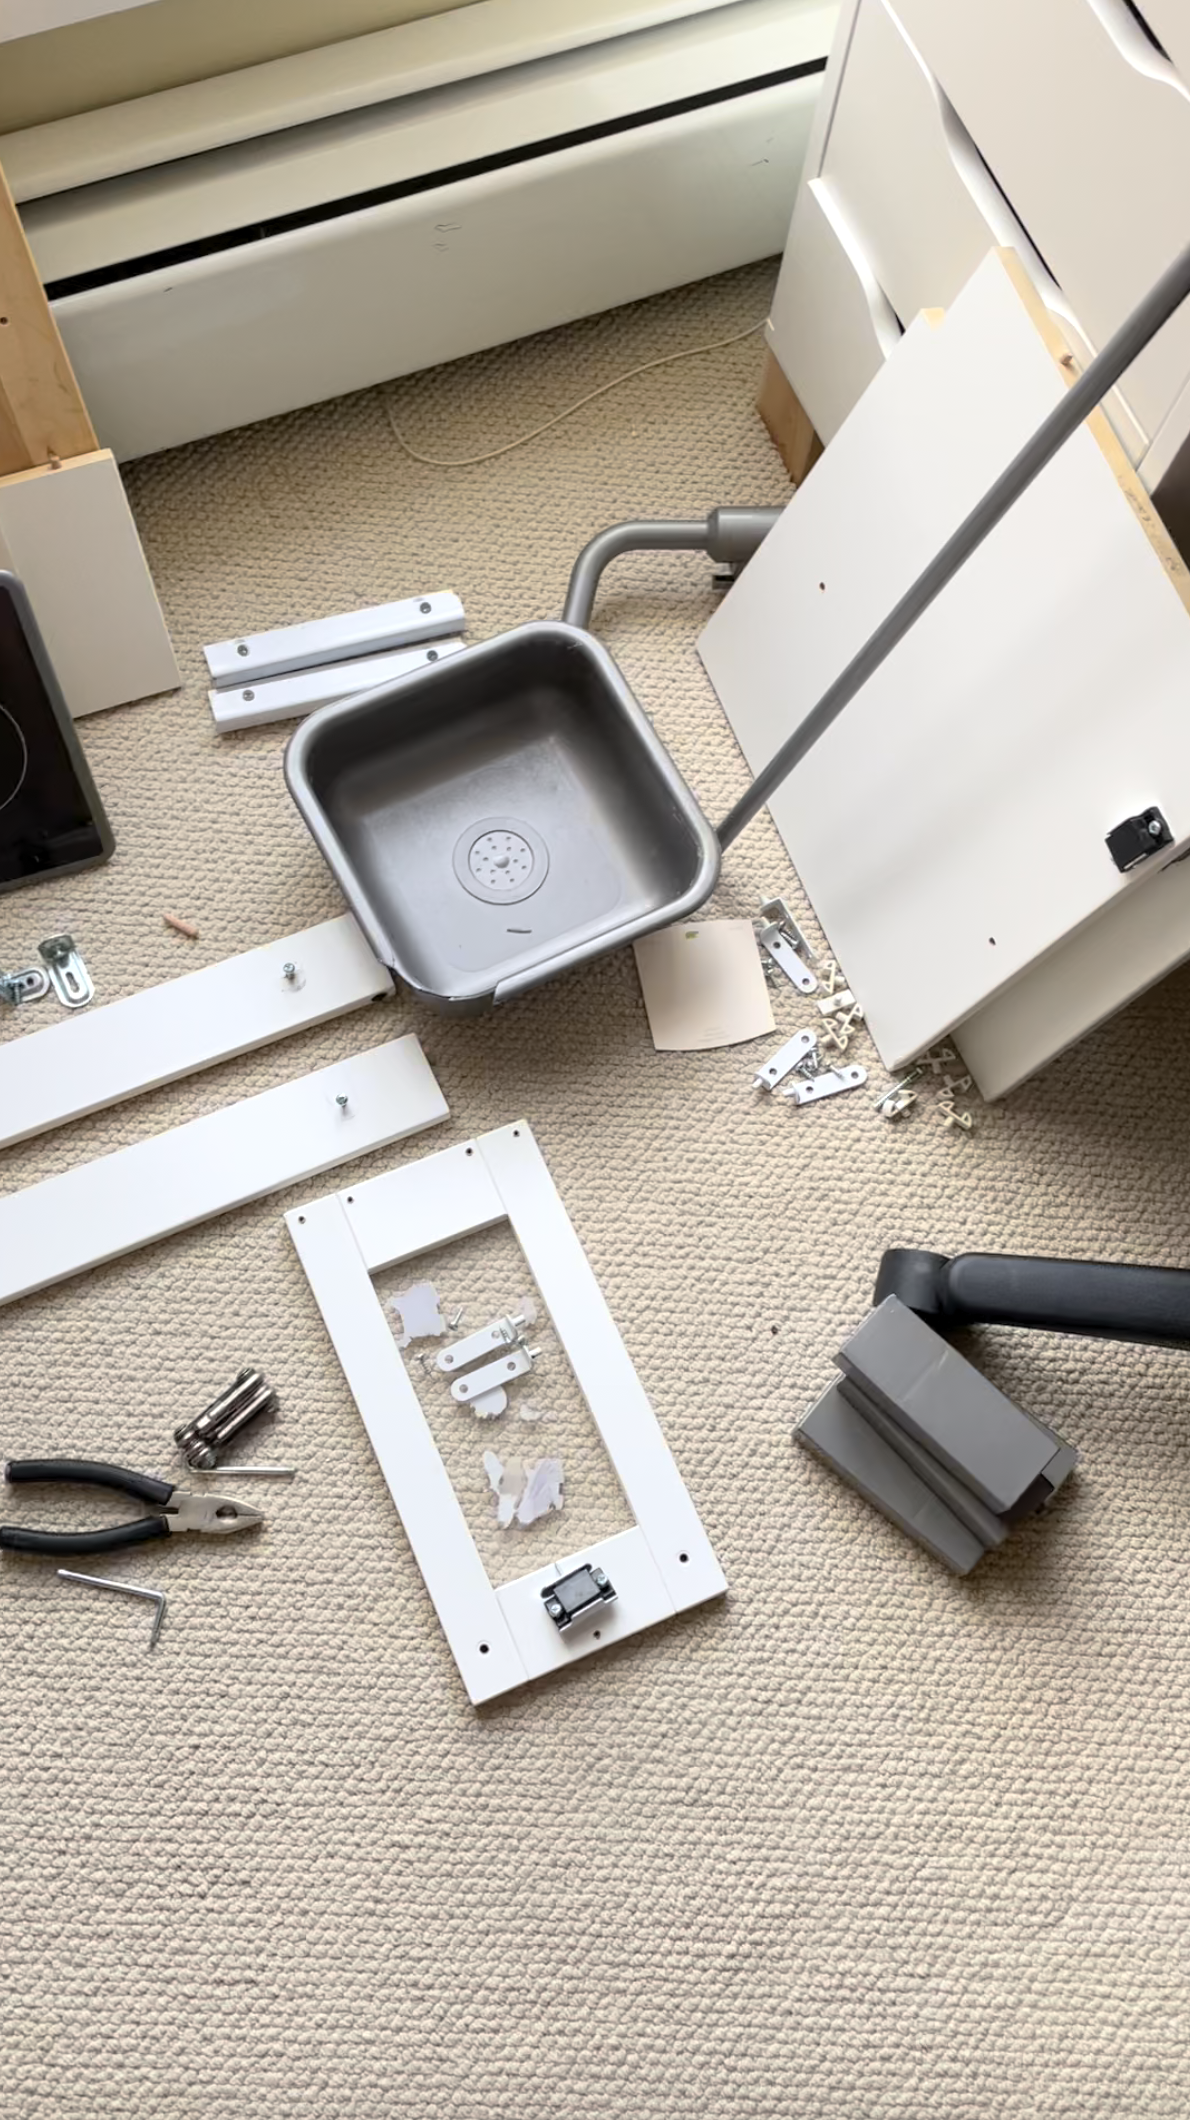
The sink had been held together with duct tape… And when I took it off realized it was because it had a massive crack in the top and needed to be repaired to make it usable.


After taking a good hard look at it, I thought I had made the biggest mistake for spending $40 on this, and should have just bought new. But I didn’t know any better, and didn’t know if this would actually come to fruition… So here we were.
I took everything apart and set aside all my stain samples, everything that I had purchased for the kitchen so far and took a good hard look at how on earth I was going to do this.
(There were definitely some tears involved when I discovered that crack in the sink)

Step by Step:
Now, likely what you came for, here is how I did everything without going into too much detail about each step:

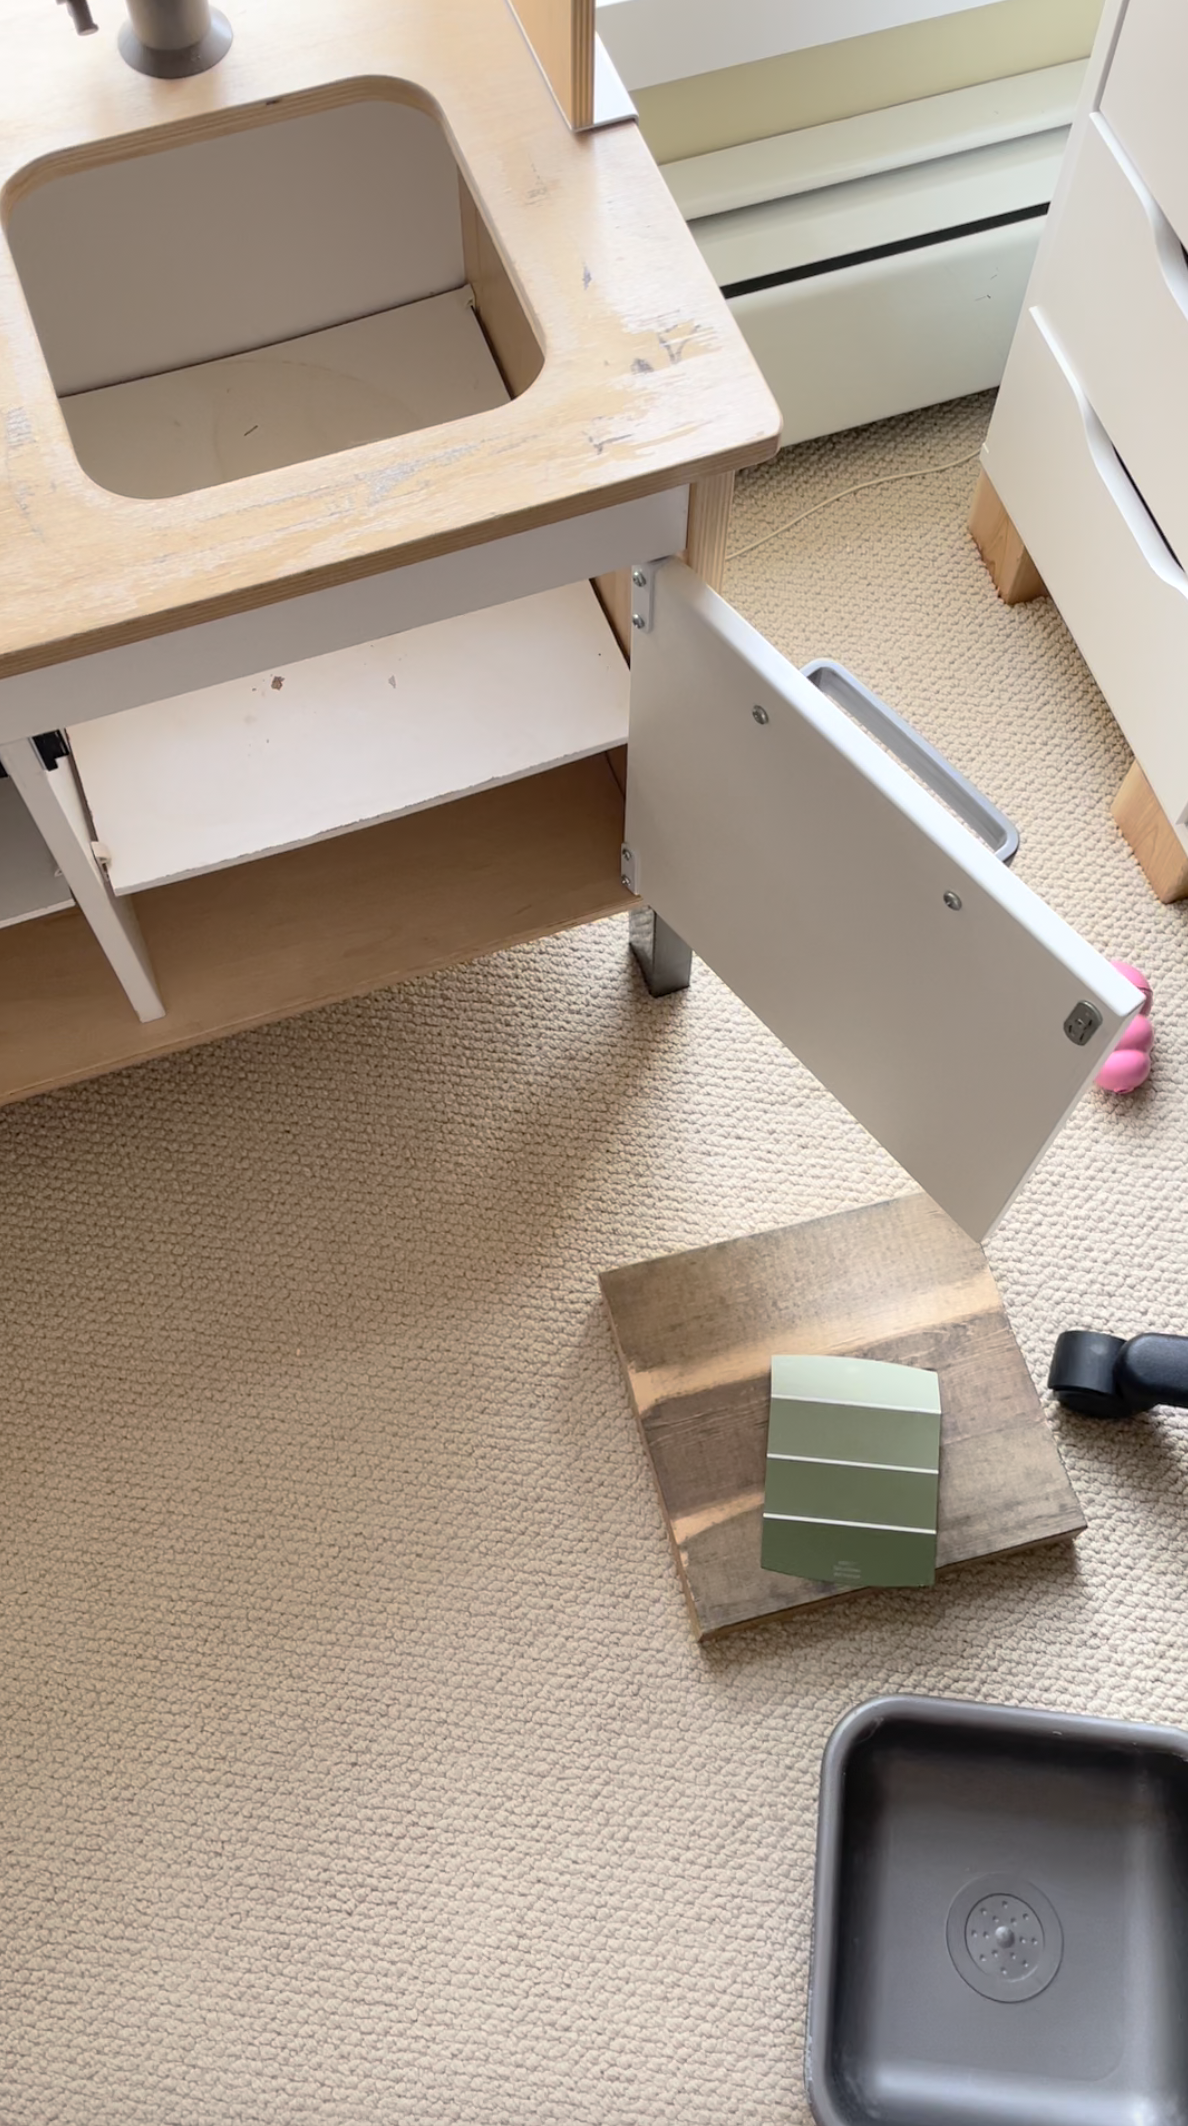
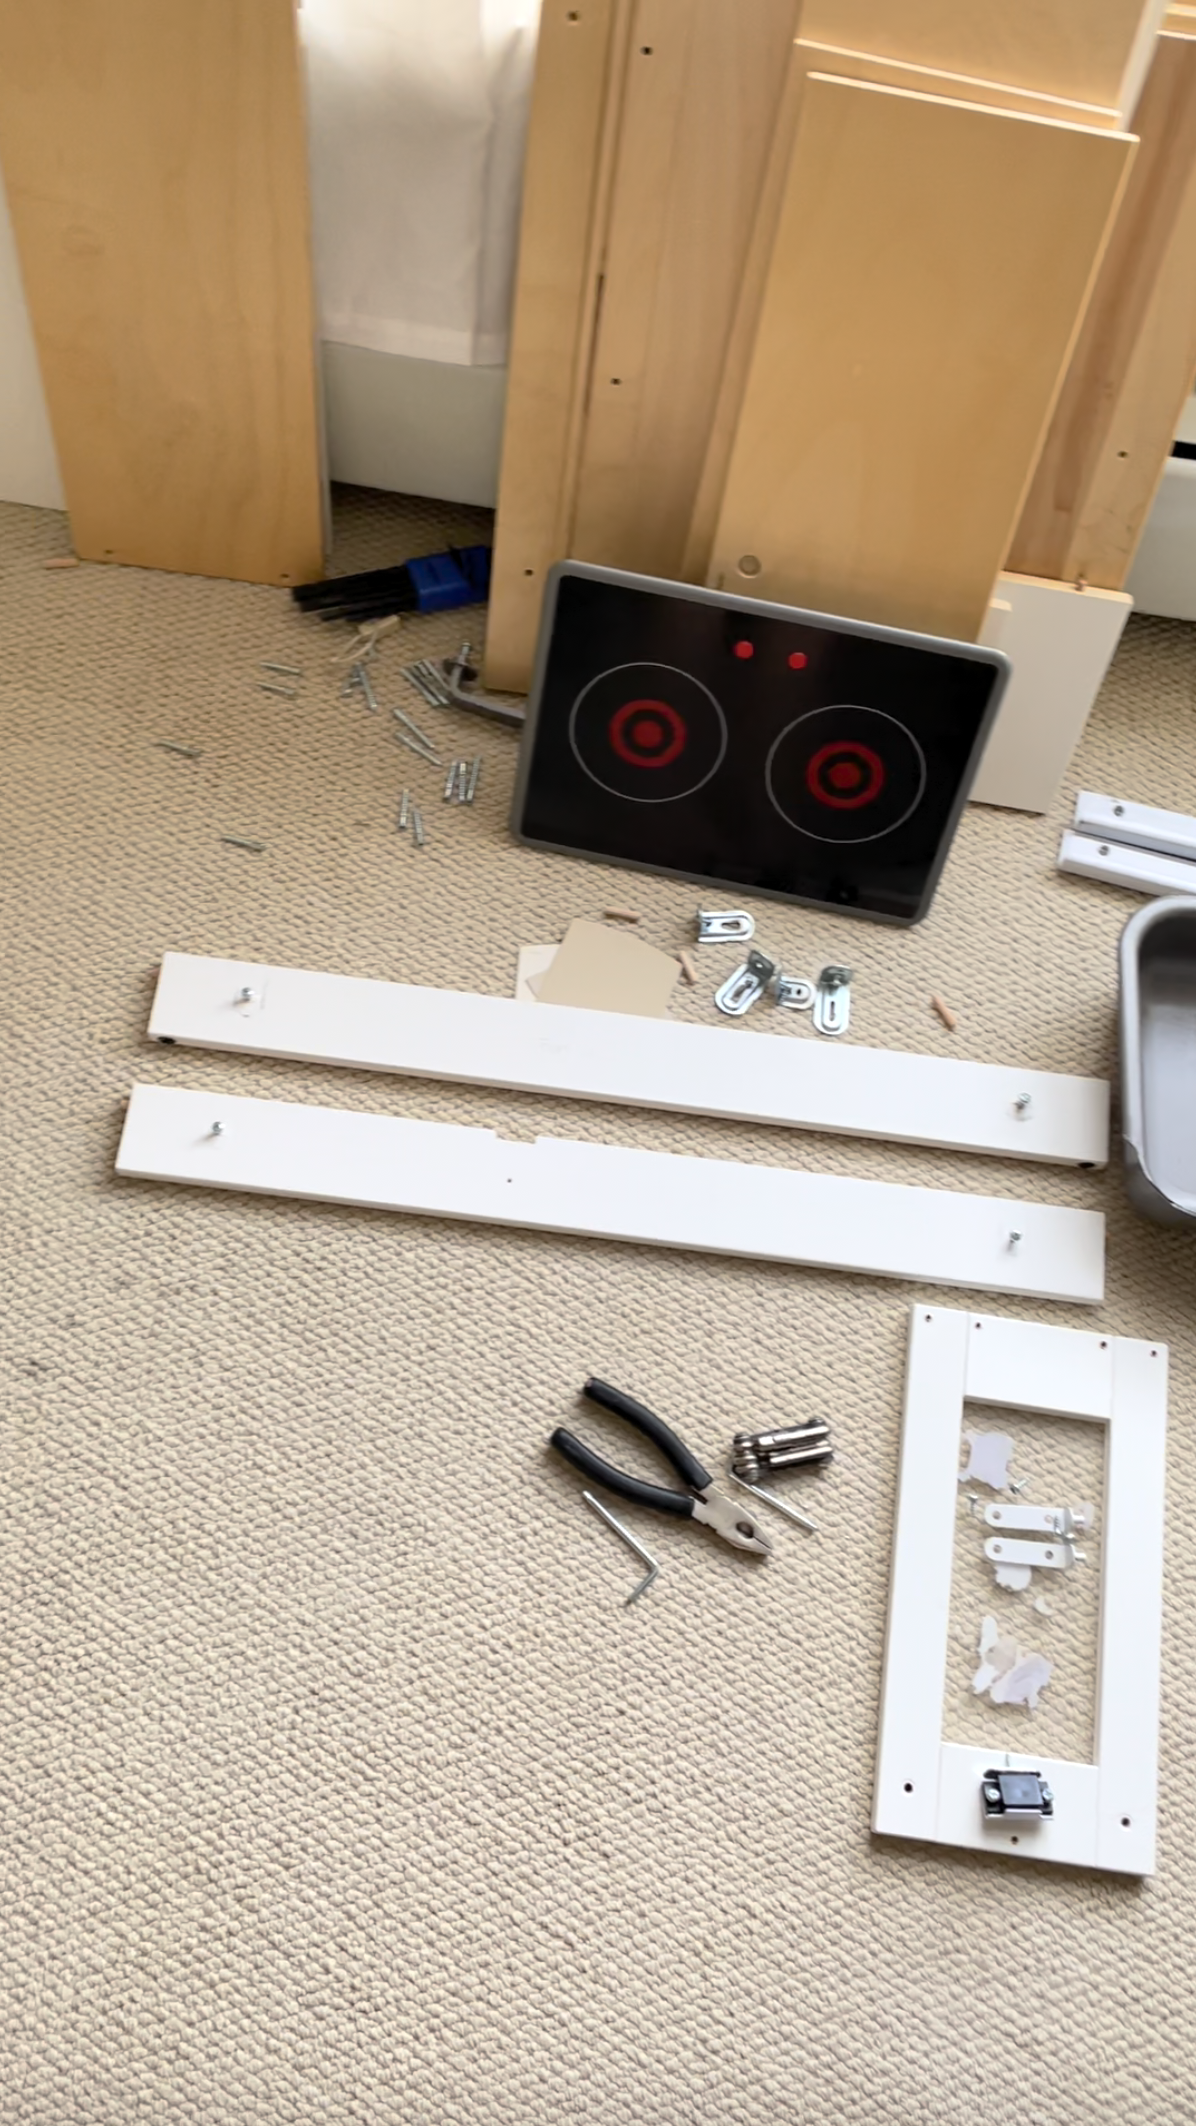
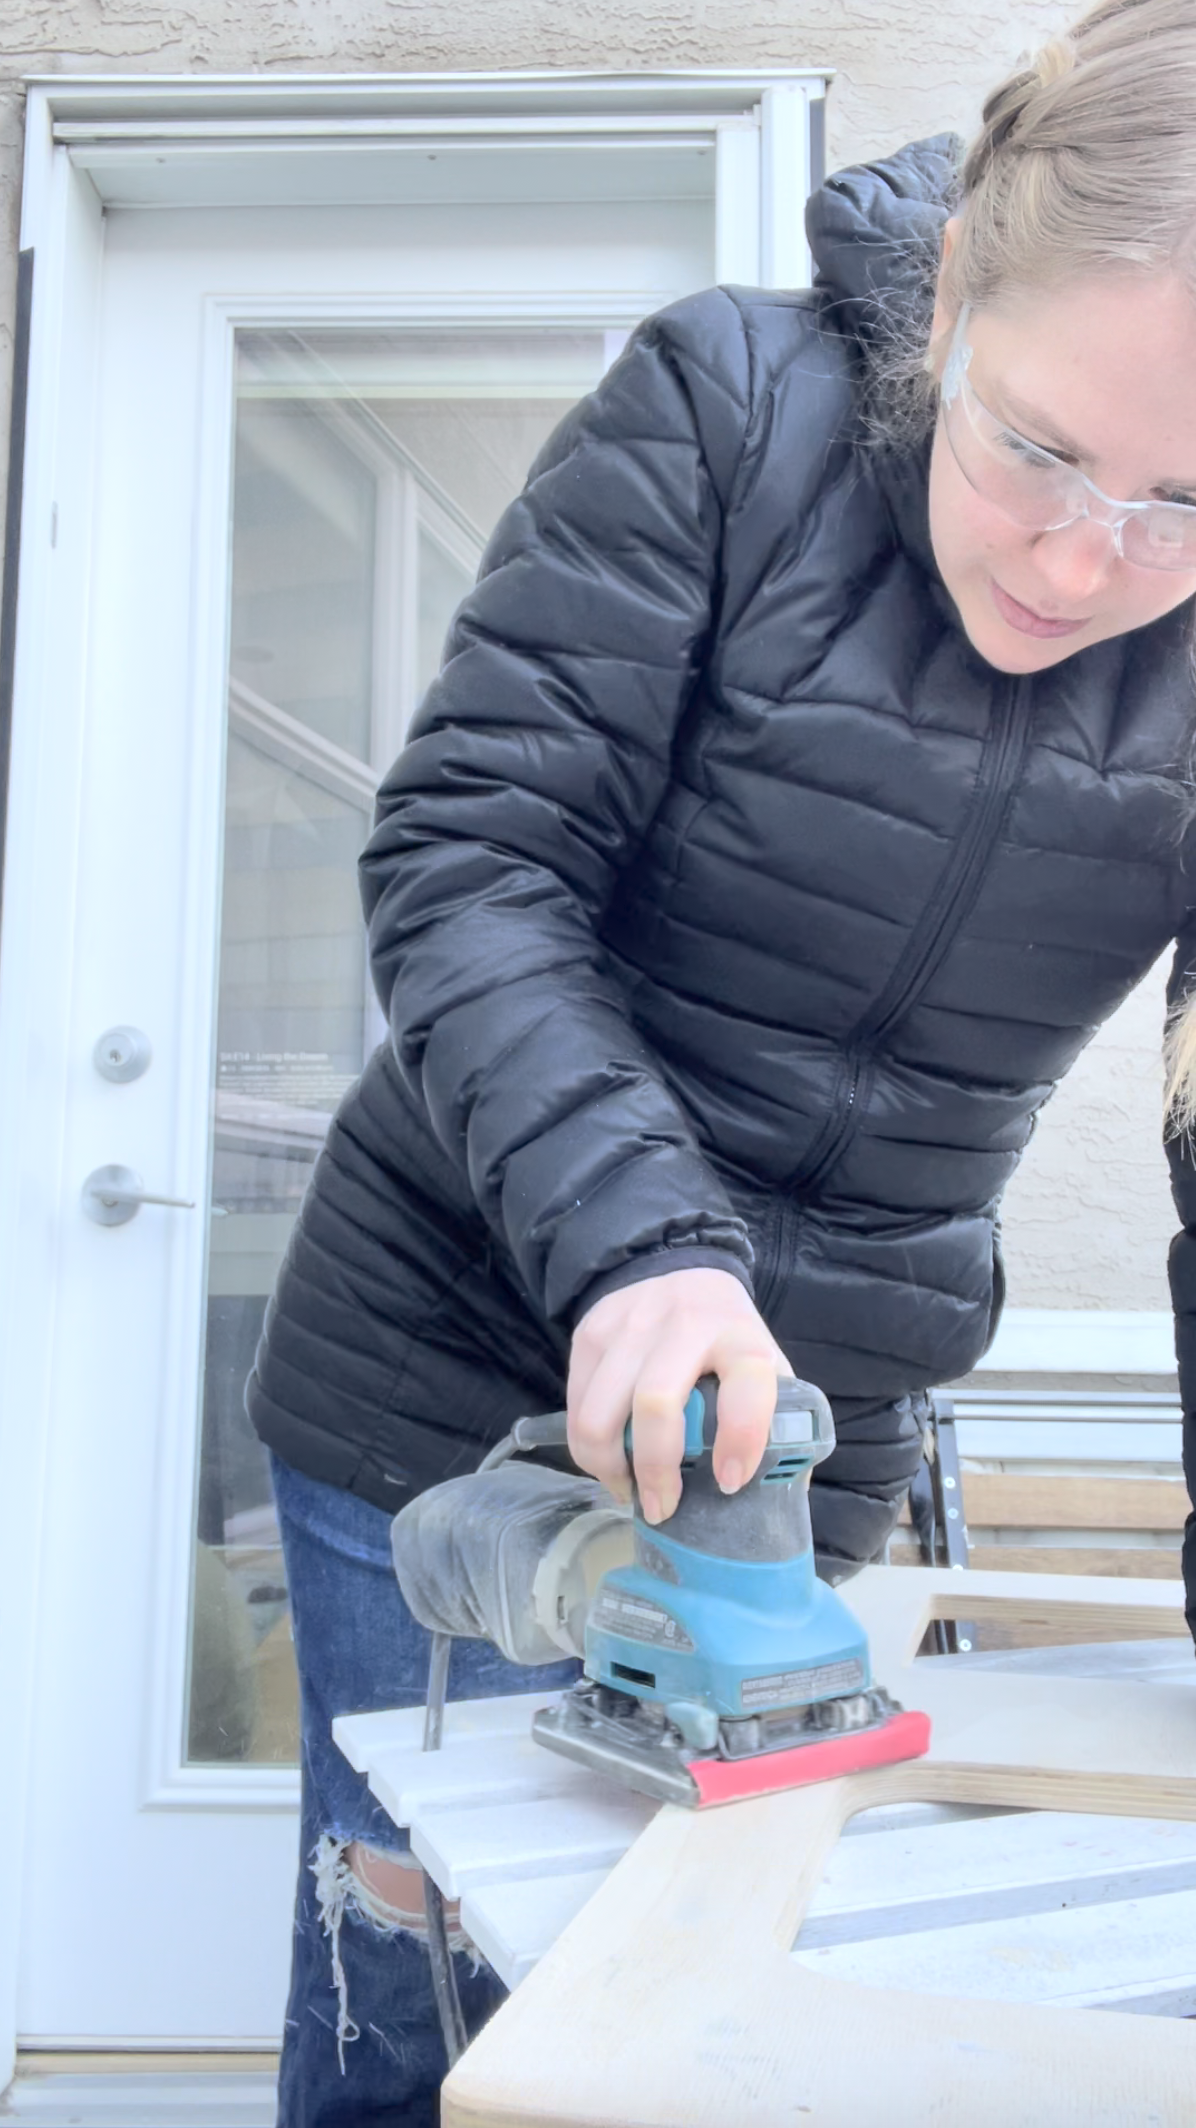
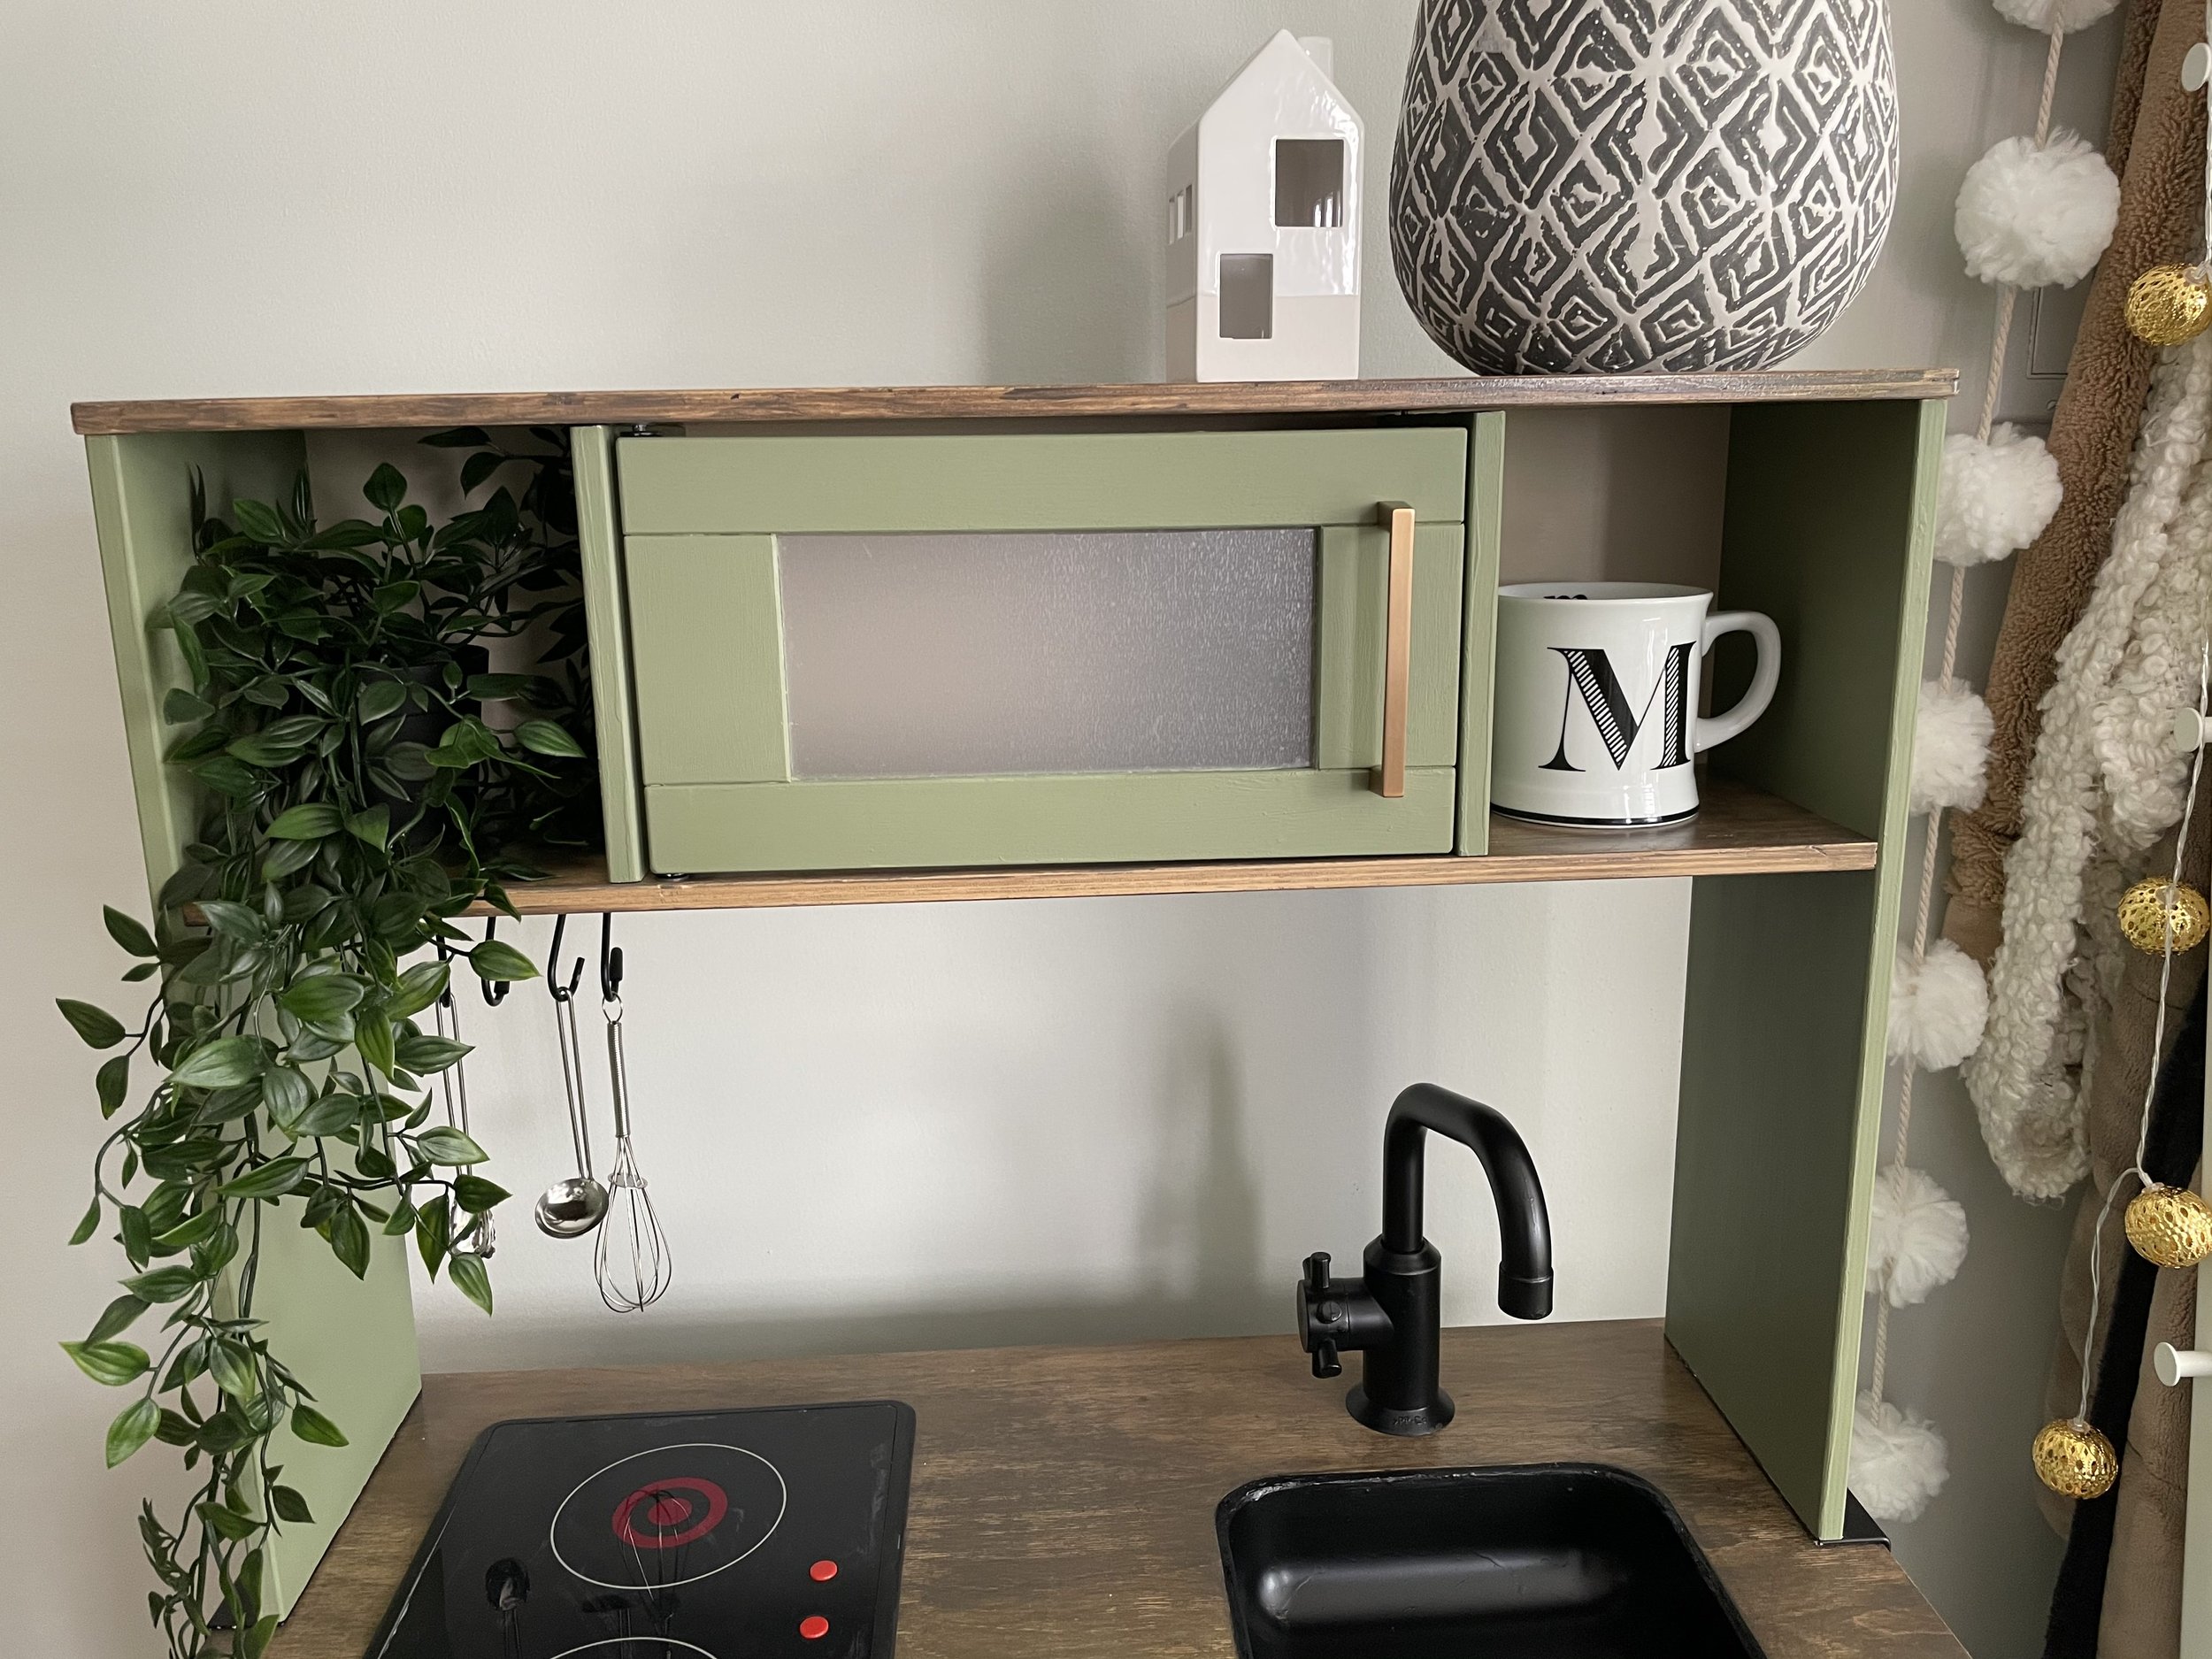
Sanded everything that was wood. I took apart the entire thing to I could easily sand every piece to get the sealant off the countertop. 10/10 recommend this if you are staining the wood, but not necessary if you are just painting or covering it with peel and stick. If you are painting it, use a proper primer so that the paint adheres to the surfaces. Here is a link to the Primer at Home Depot. I also removed all the stickers and used goo gone to get as much as possible. I realized based on the microwave window I’d have to cover the door with something translucent to hide all smudges.
For the cabinets, I wanted to use my own brass fixtures, so I had to unscrew what came with it, fill it with wood filler and wait for that to dry. Once it dried though, it was easy to sand and prep for painting. (Just make sure you’re doing this the right way around or else this comes back to haunt you when you put it together in the end.)

Started painting the different pieces (while disassembled) their colours. I chose to go with two different colours of Green (BEHR Milkweed Pod and BEHR Ecological) for the cabinets and microwave. I would not recommend using two different colours that are such similar tone. I painted the inside of the cabinets and microwave door with the darker green, and the outside of the cabinets with the lighter green. It just led to confusion down the road while I was assembling. In addition to the two green colours, I chose BEHR Gobi Desert for the inside of the microwave and cabinets.
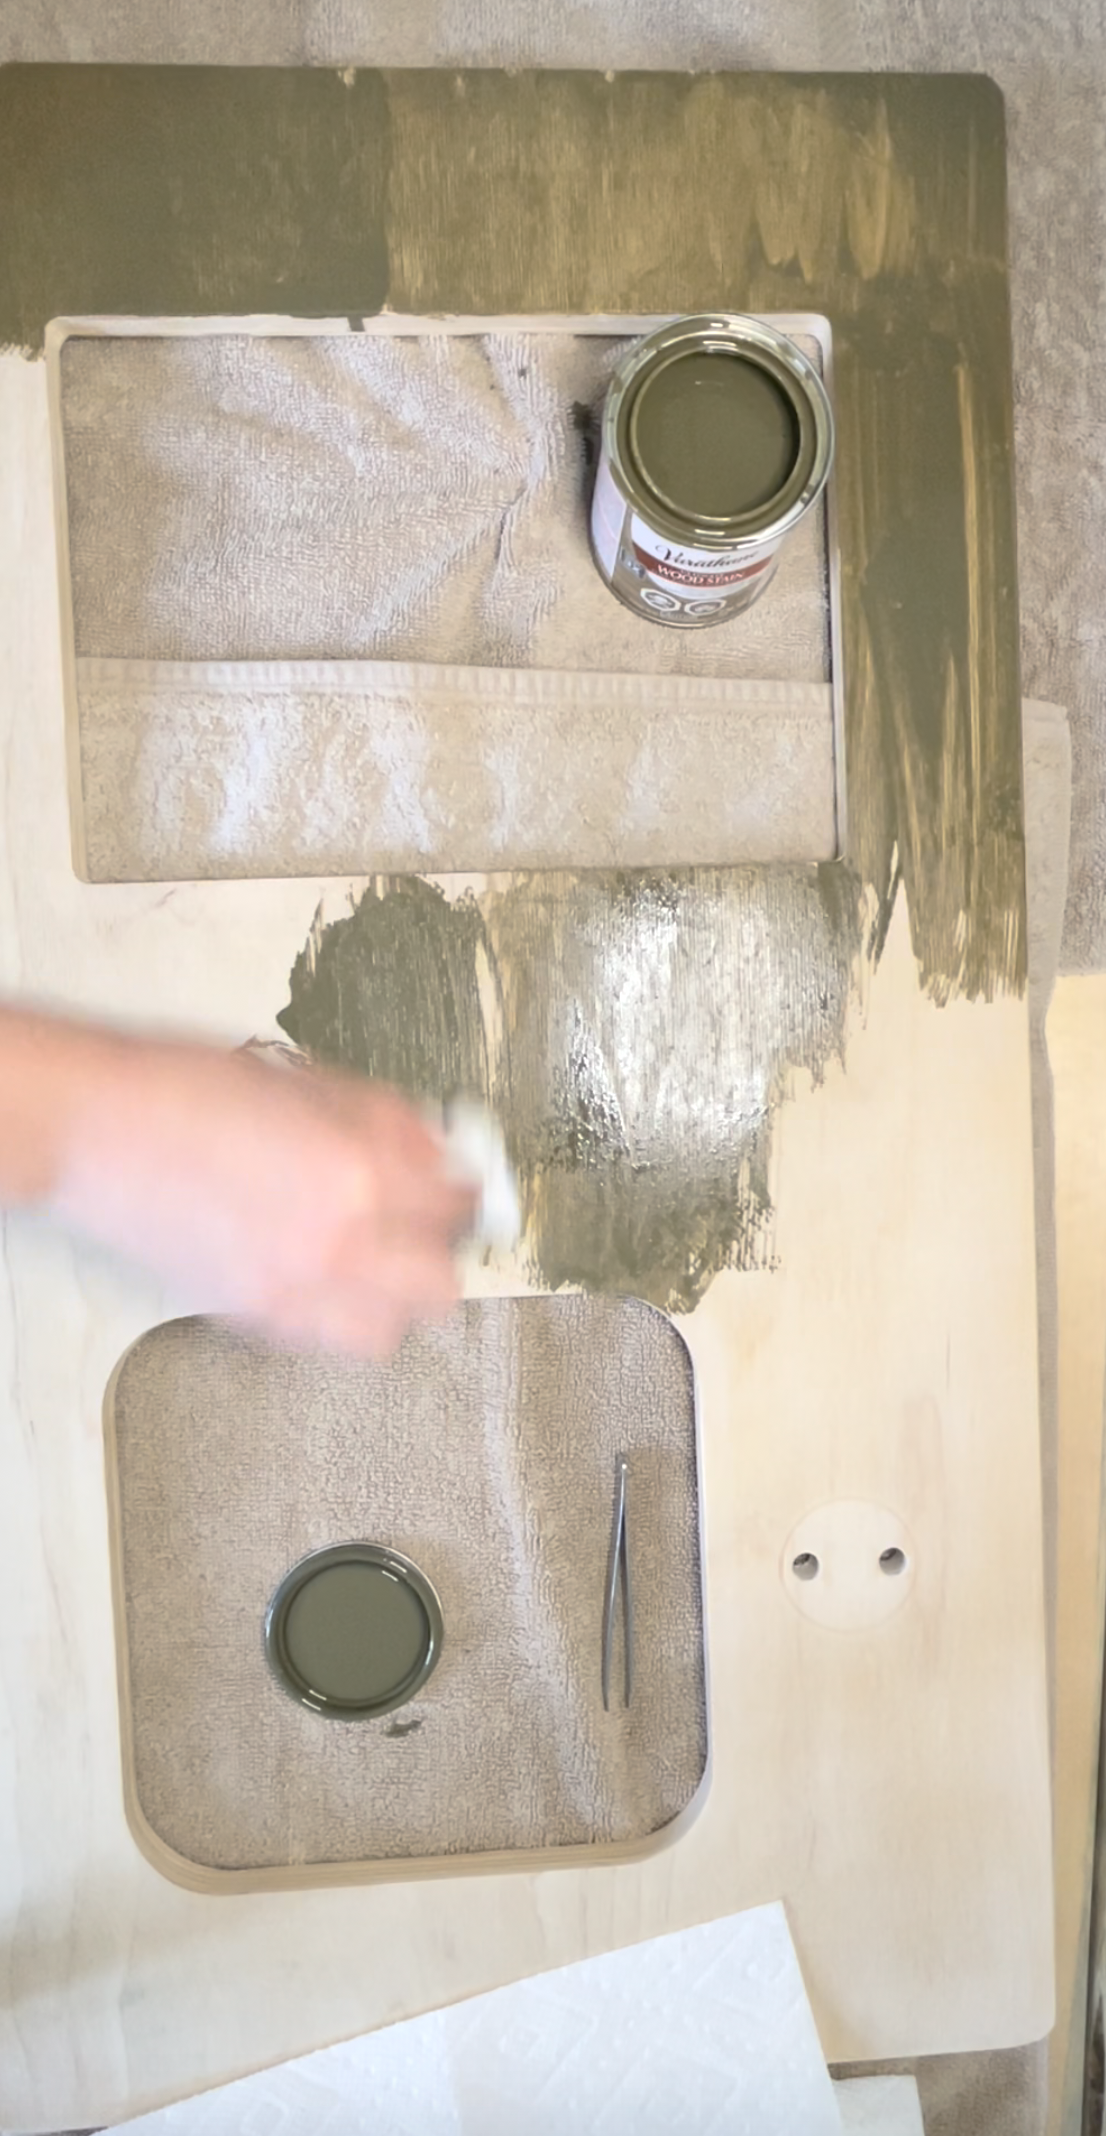
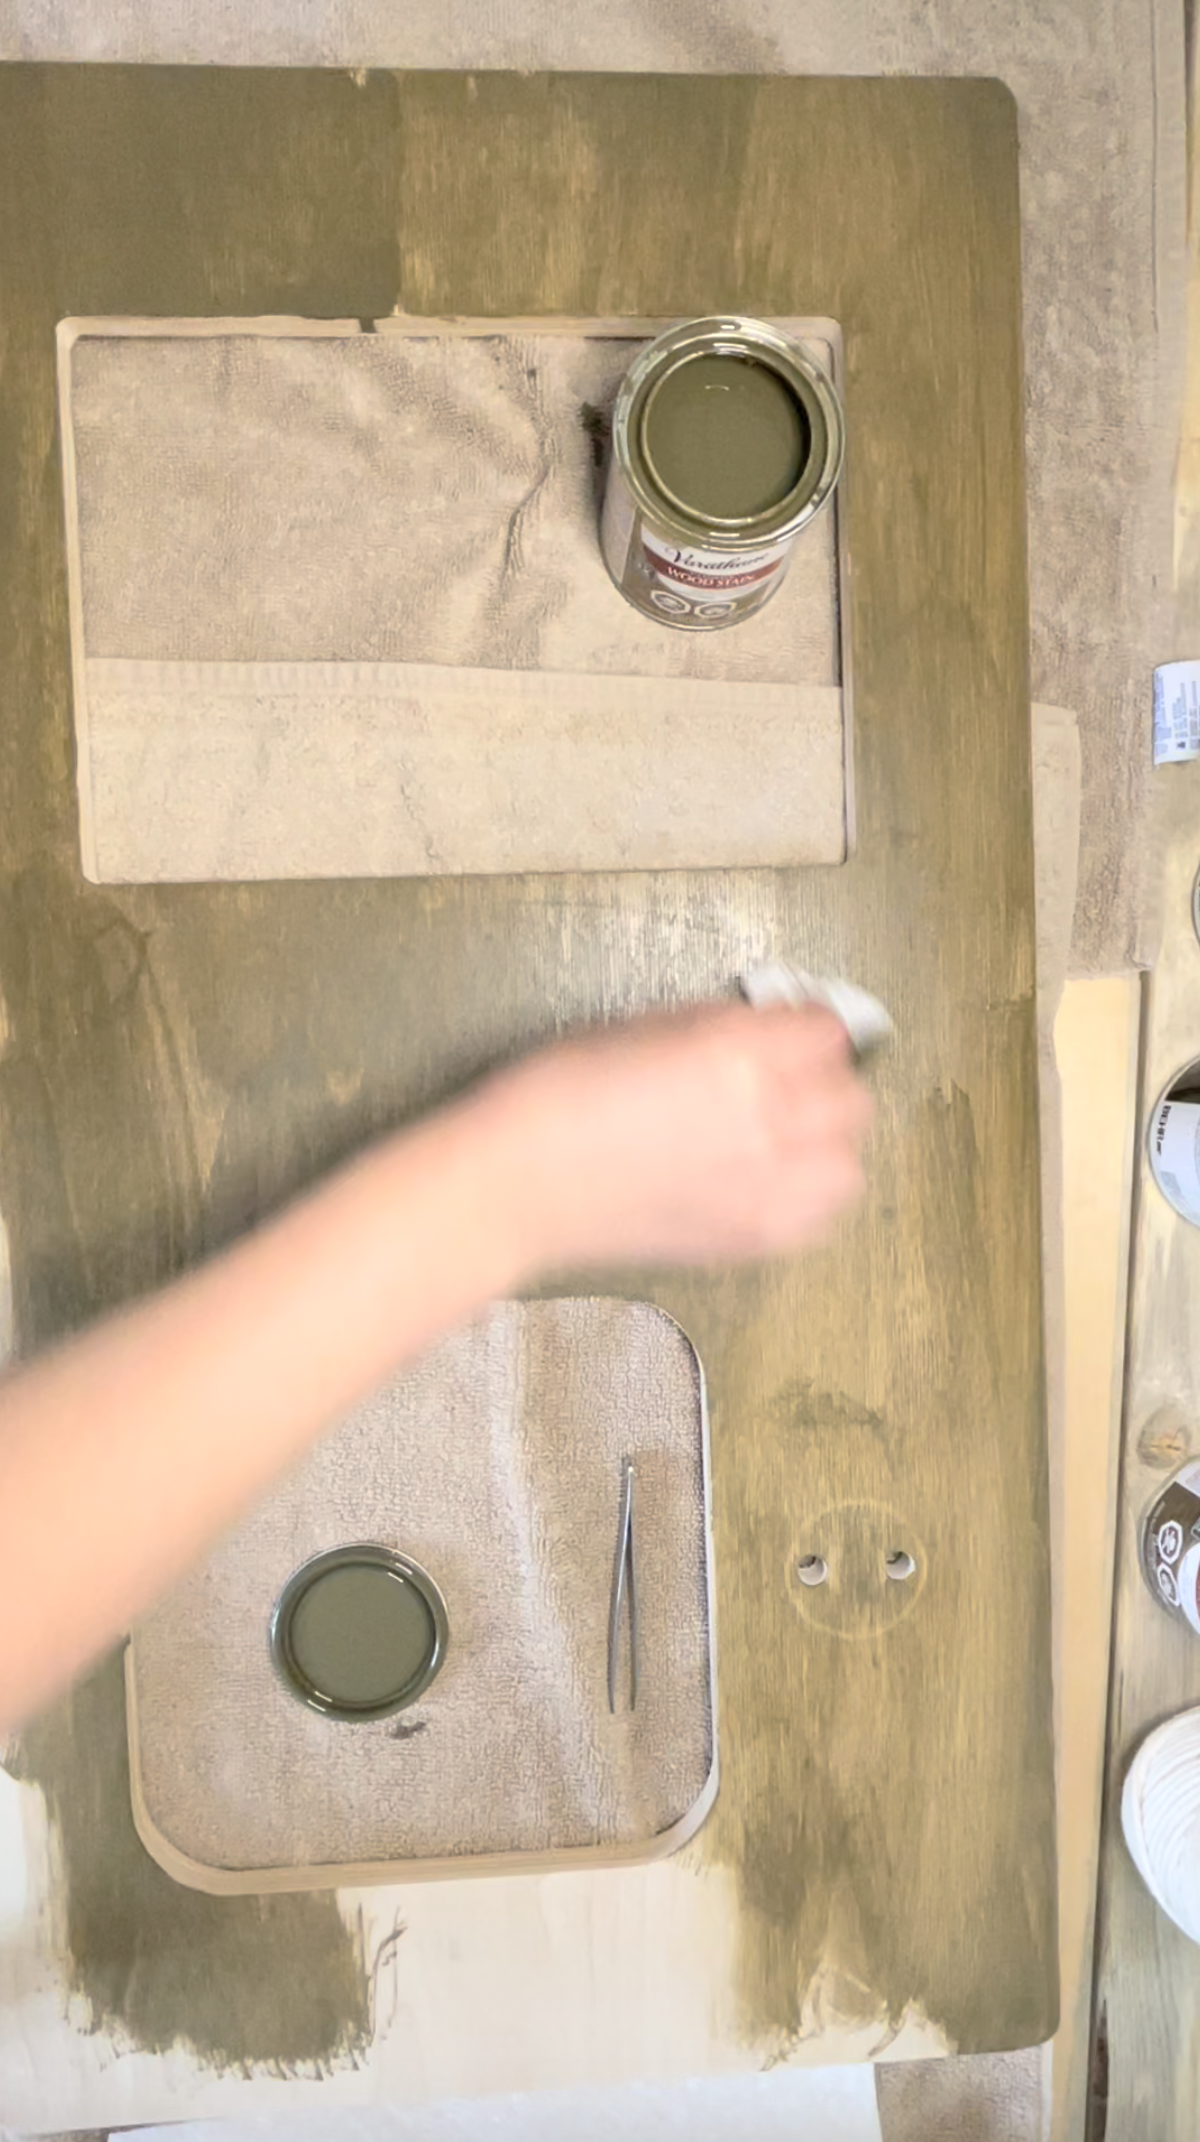
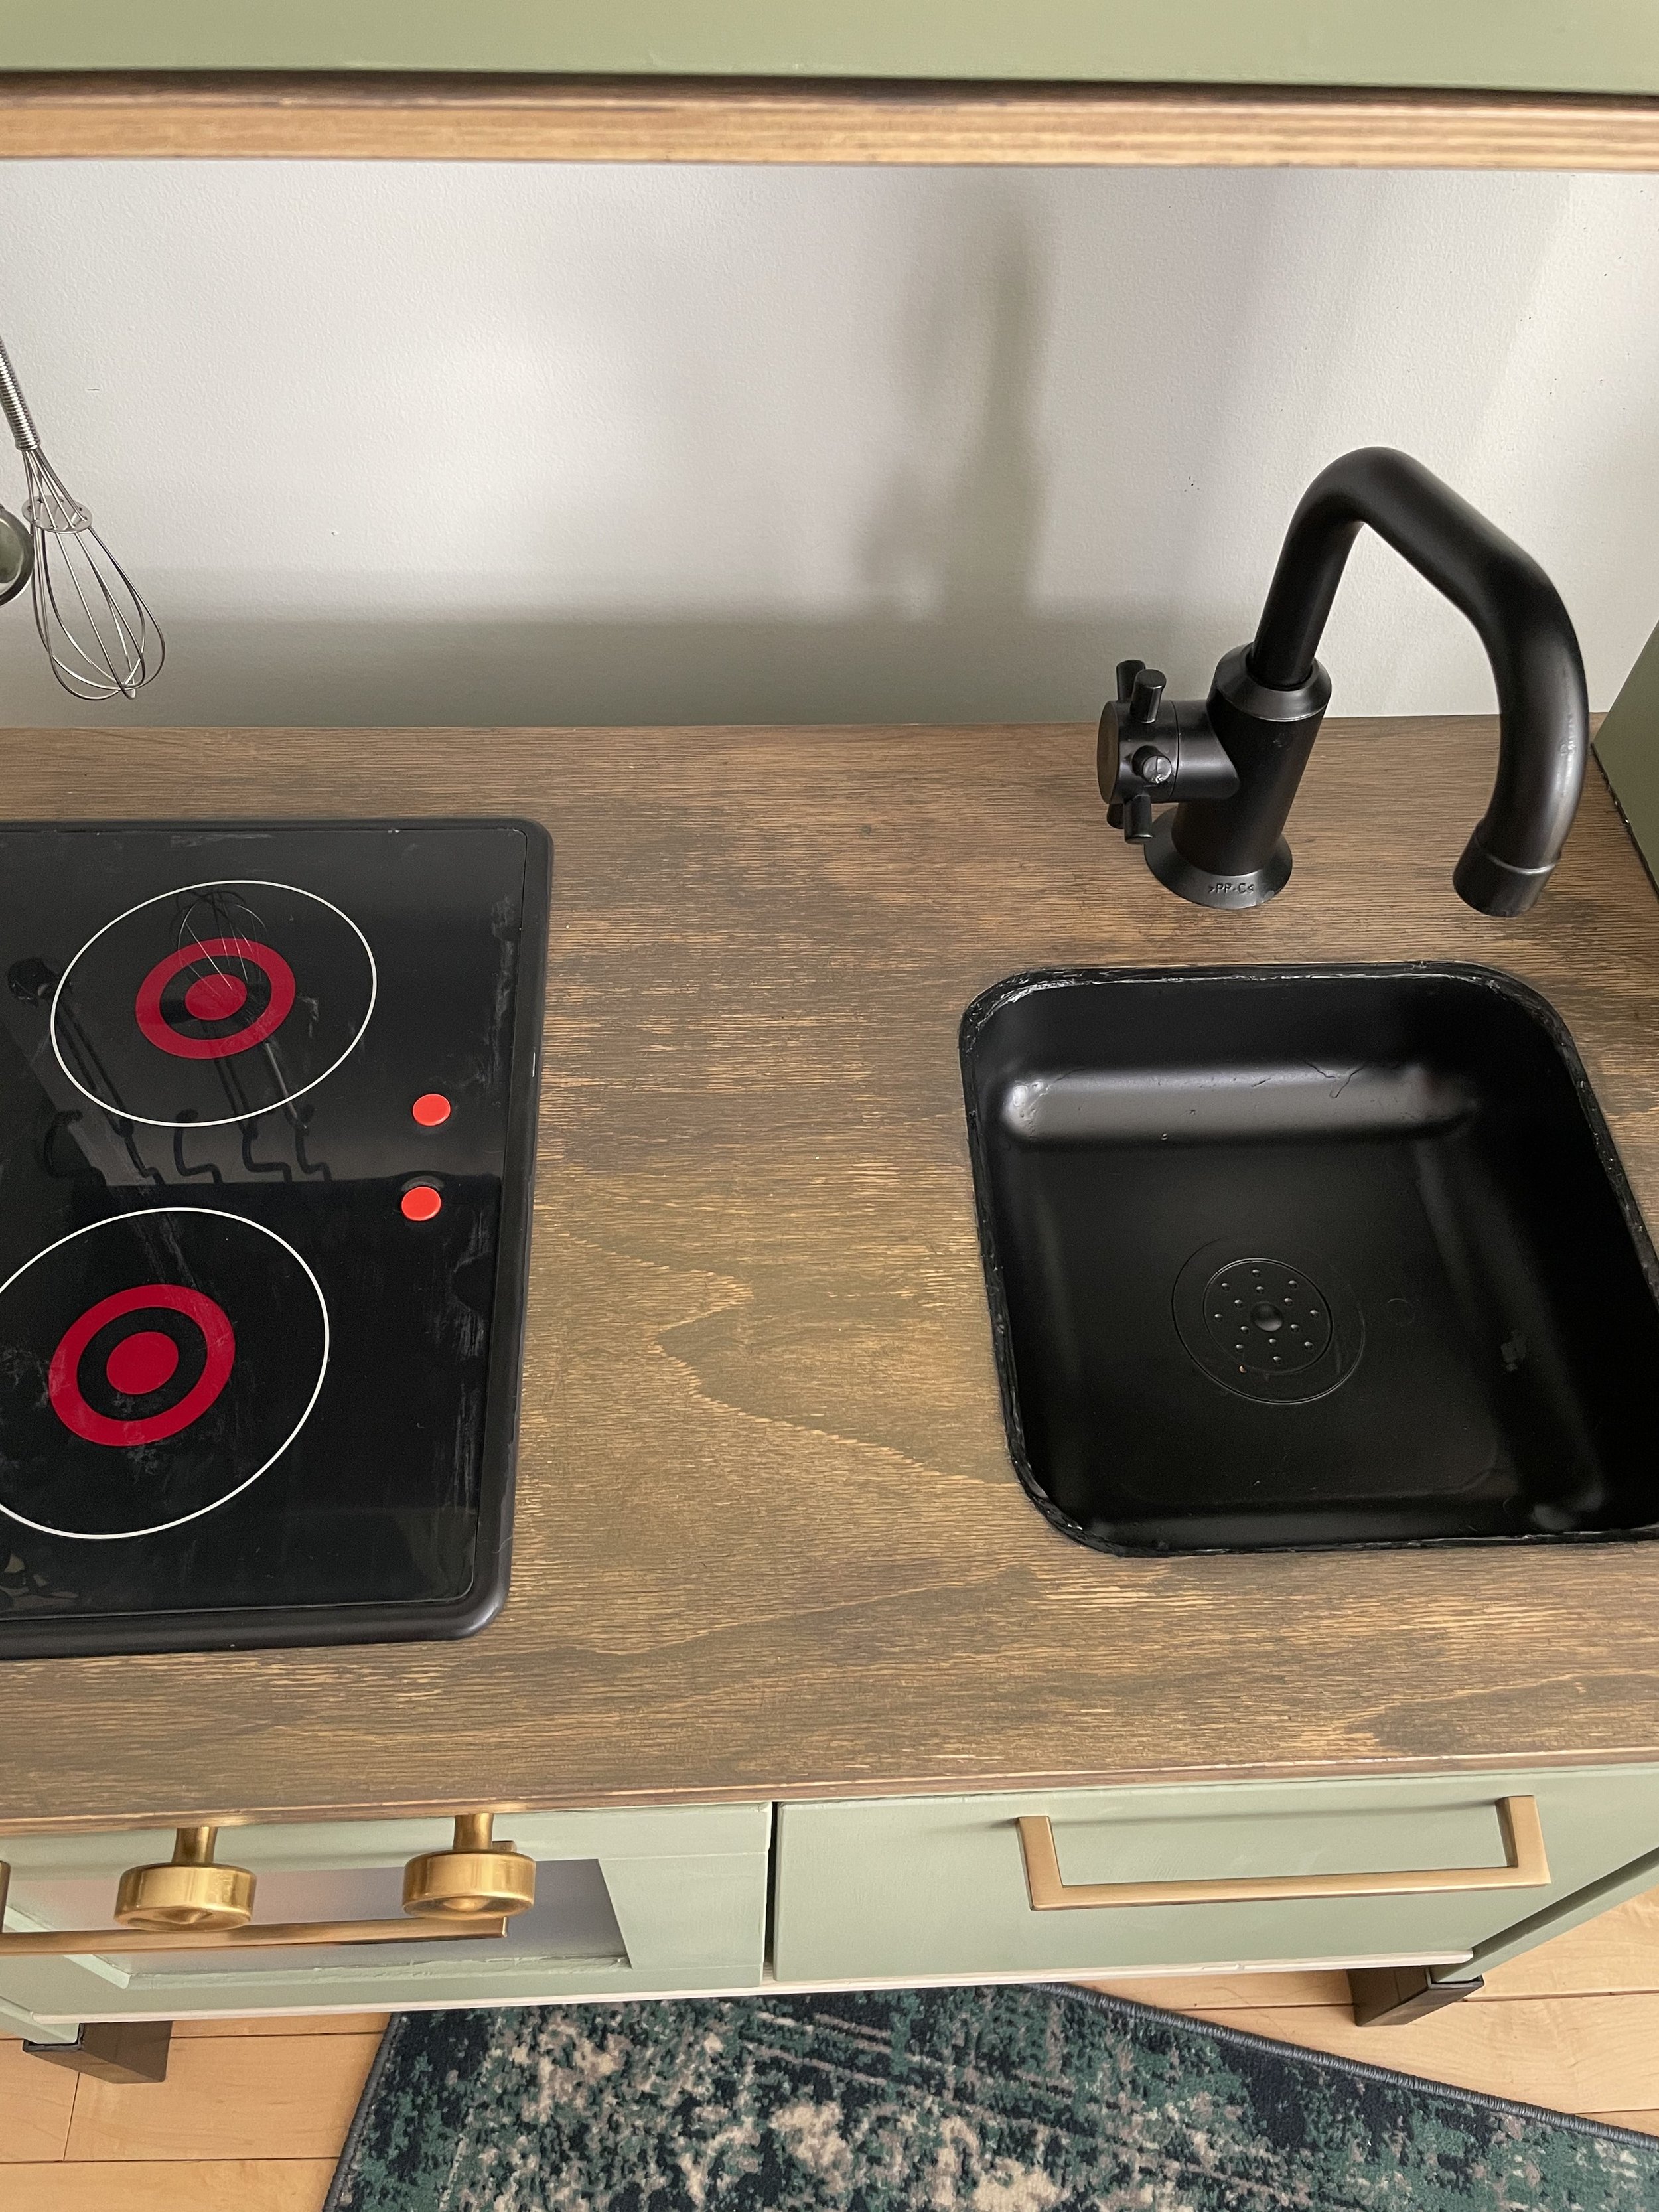
I stained the countertop and the two other wood pieces that made up the upper cabinet. This was incredibly satisfying, and I absolutely destroyed the towels that were underneath. I recommend gloves and patience with this part (I had neither). I sealed this with a clear gloss sealant after two liberal coats of the Briarsmoke Varathane Wood Stain, both from Home Depot.
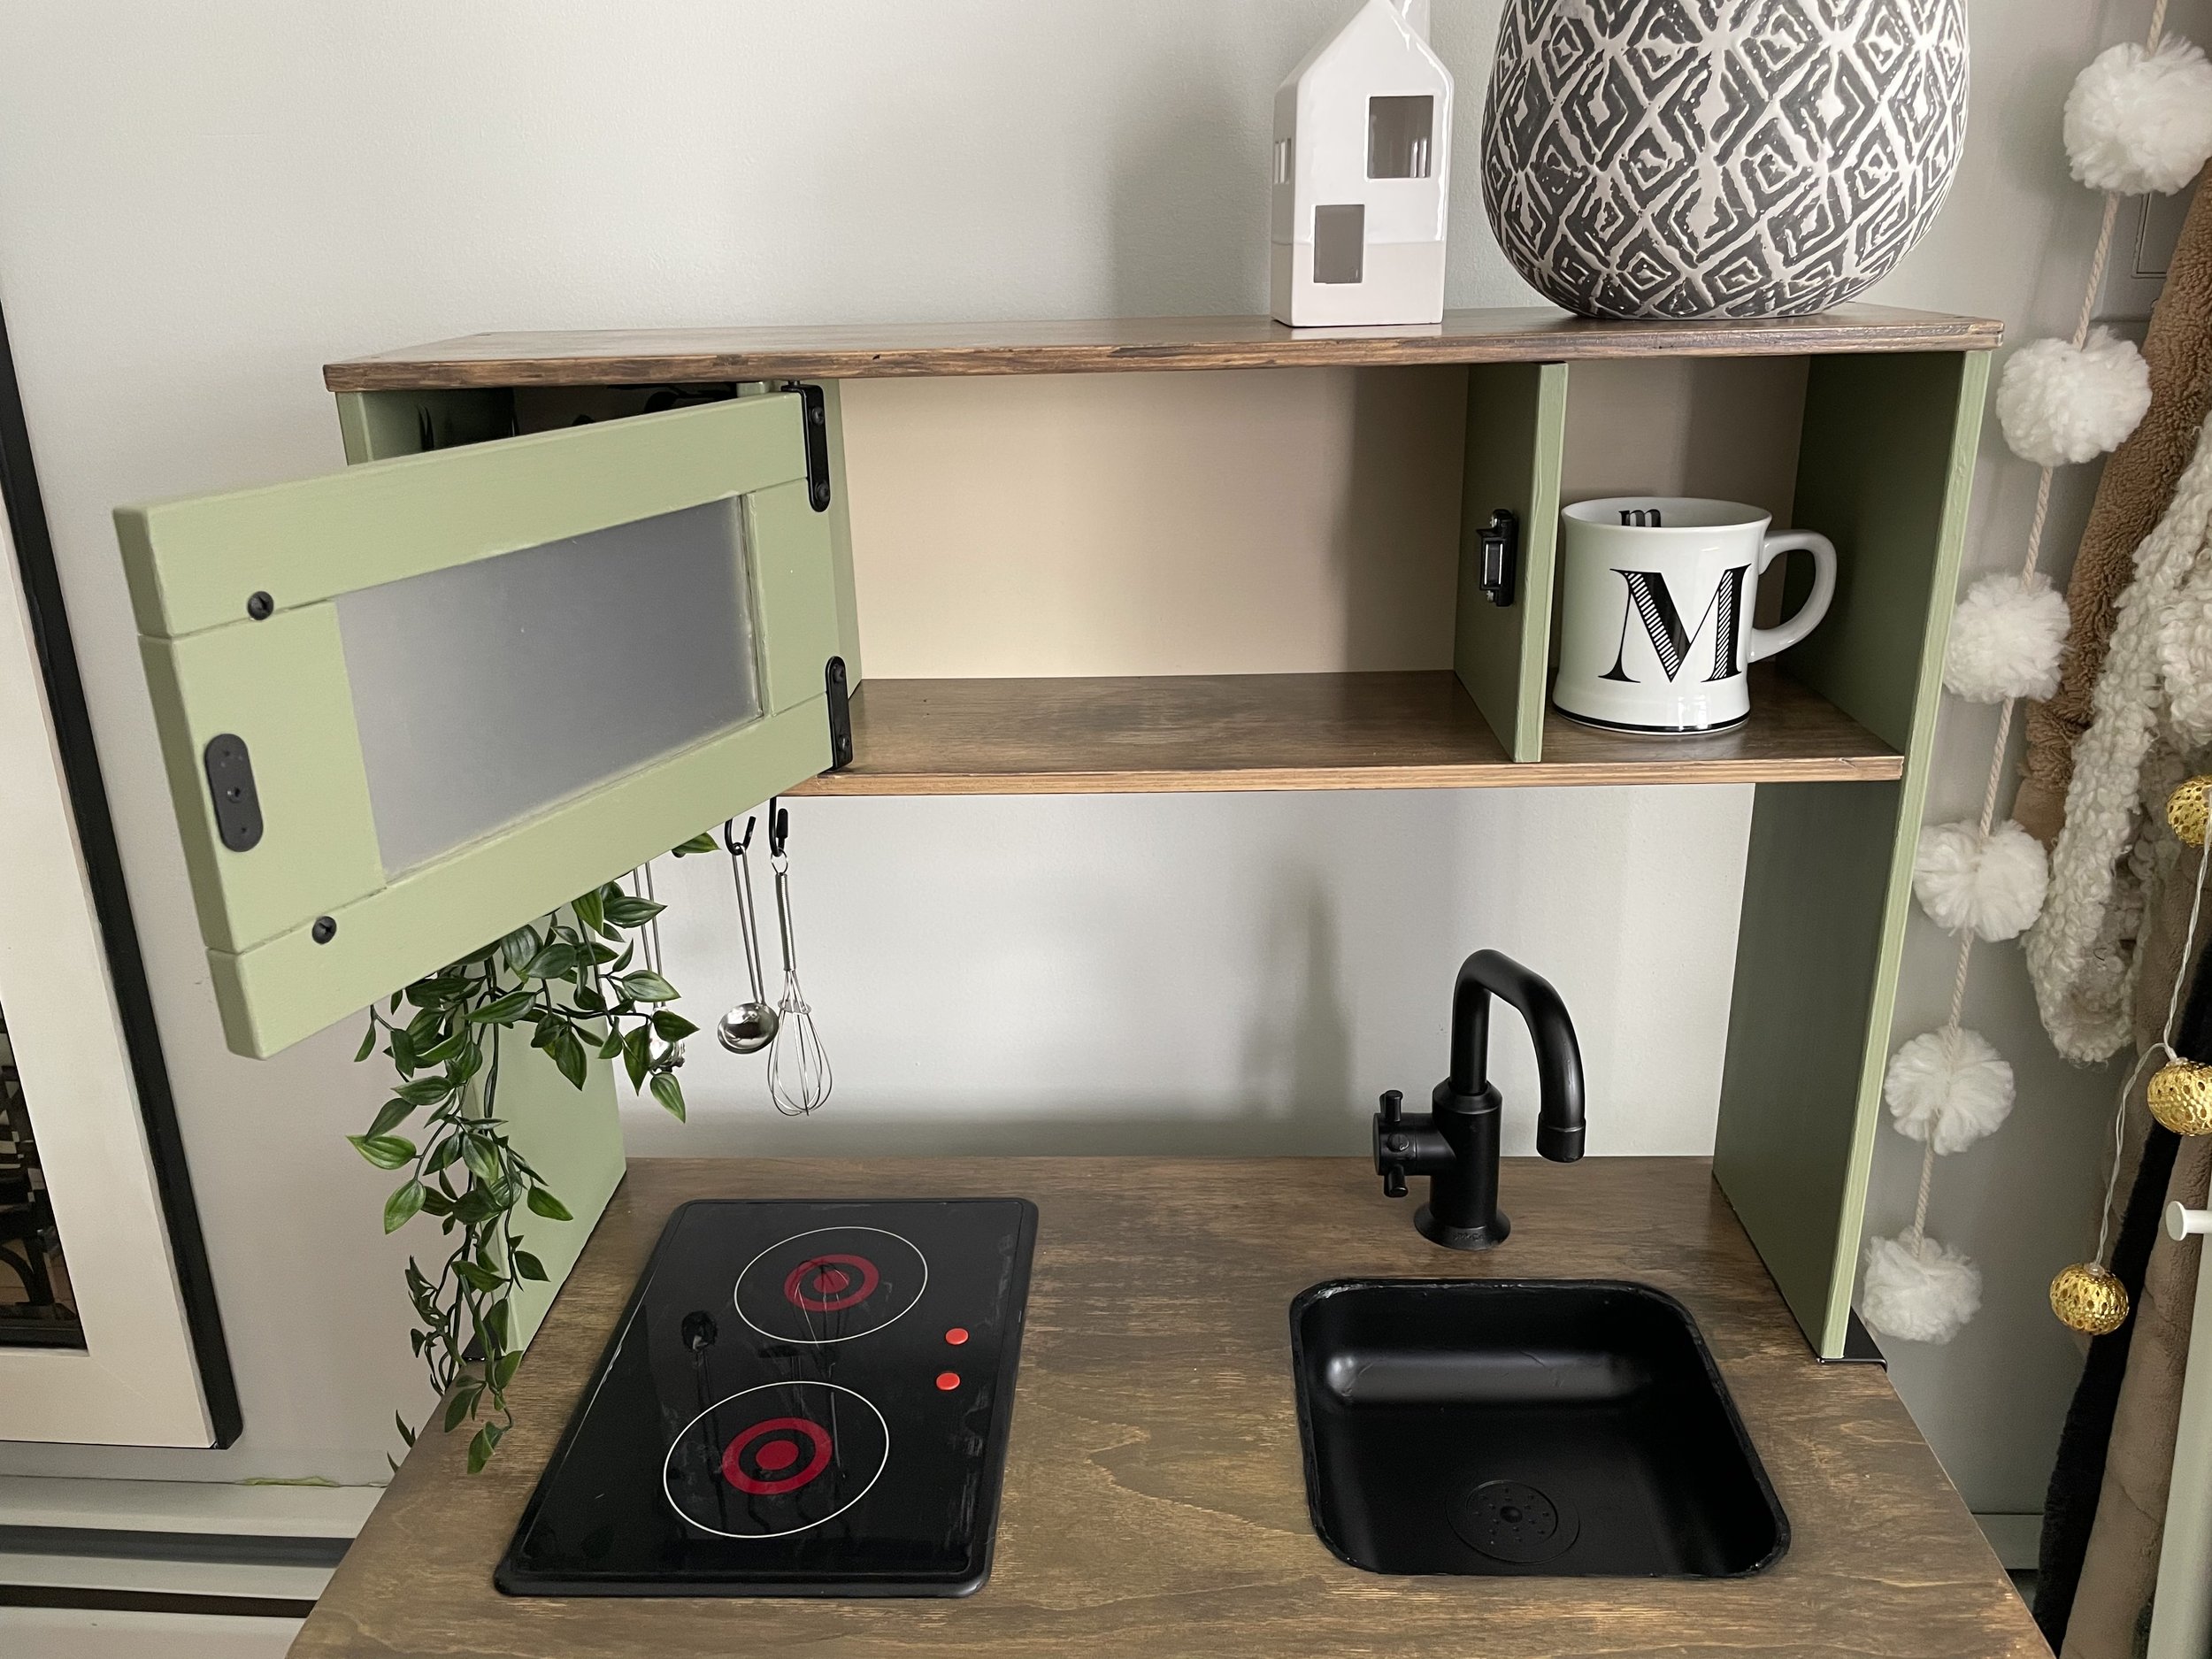
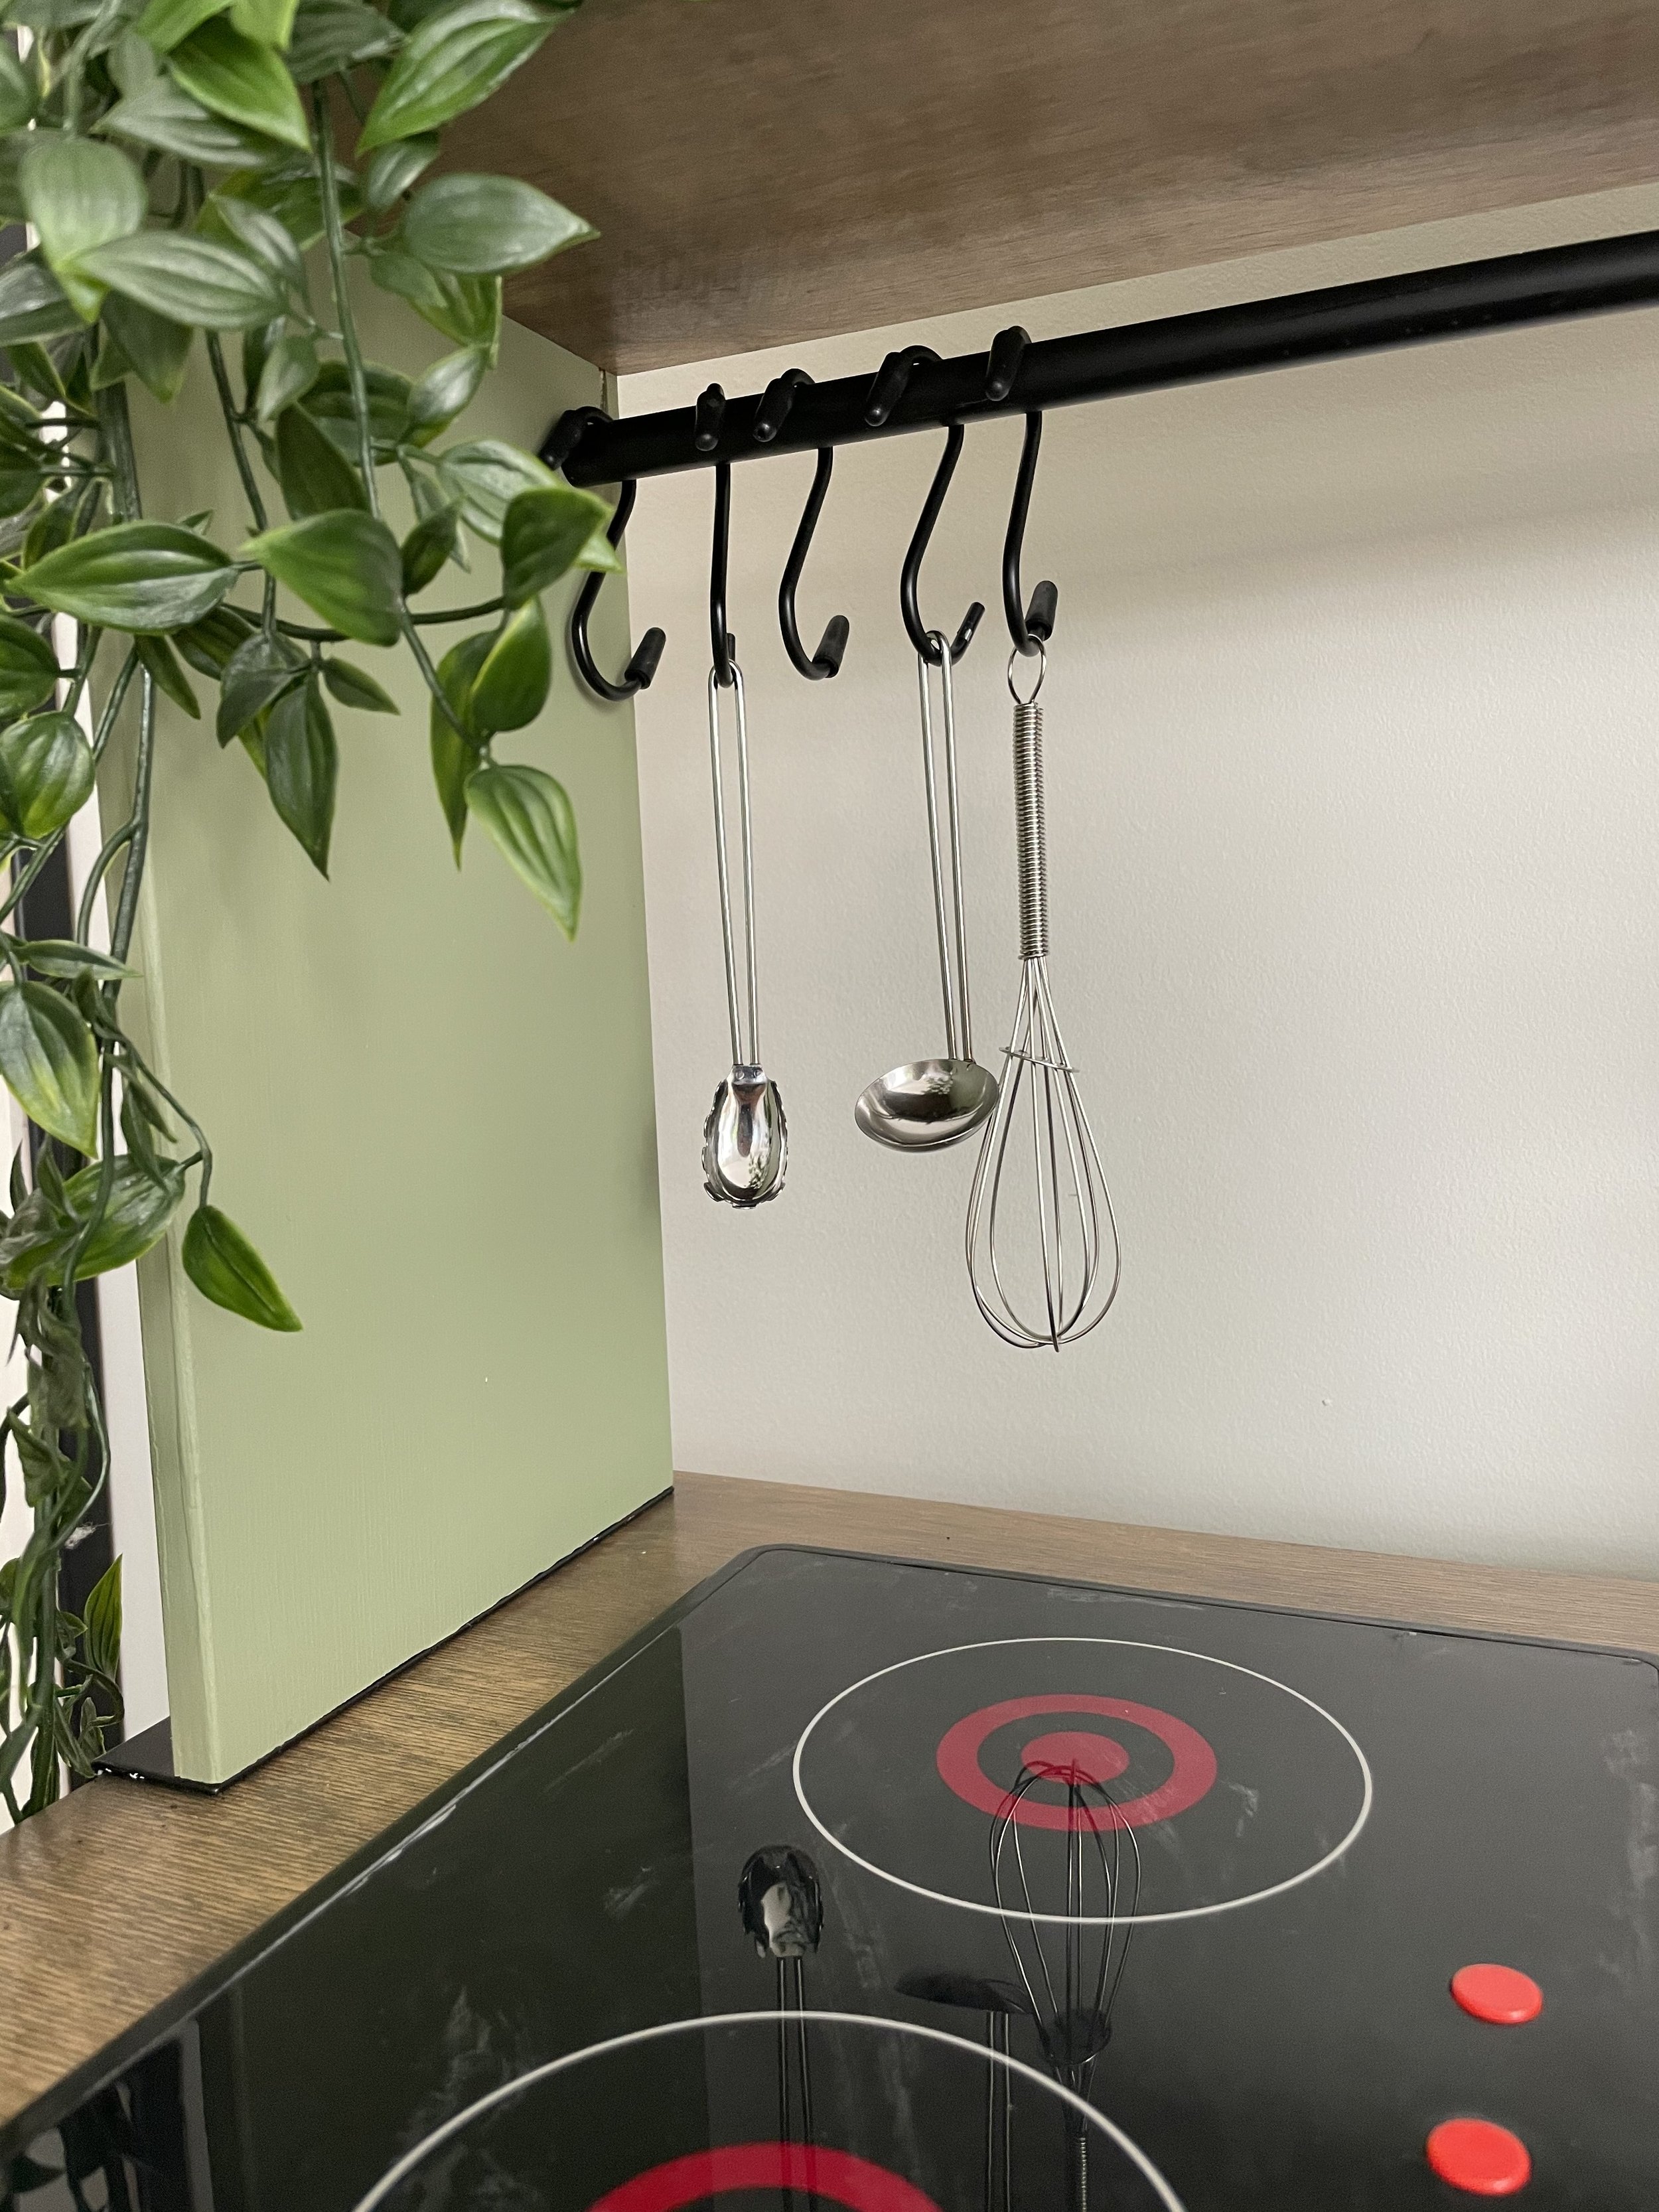
I used my handy Matte Black Spray Paint. I sprayed the pole that held utensils, the hinges, that screws, magnets and the faucet. I didn’t want there to be any silver or grey if I could help it. A sharpie came in handy after things had been screwed together and the matte black had peeled off. I also sprayed the stilts that the kitchen sits on that changes the height of this kitchen so it looked cohesive.
I put a window film on the inside of the microwave window to hide the smudges that were left behind, and it made it look quite purposeful. I used this one from Home Depot.

I went through a tiling crisis. I had the great idea to try my hand at tiling a backsplash for this project, but realized I just didn’t have the patience to put together one in addition to all the repair work so I scrapped the tile and just wanted to make it as simple as possible.
It was at this point that I decided to put some of it together and see what it looked like before tackling the worst parts: the stove and the sink. I realized I attached one of the cabinet fixtures the wrong way. So I patched, sanded and drilled new holes.
I took apart the stove part, cleaned everything inside, tried my hand at electrical repairs and got my Electrical Engineer brother involved and managed to make one of the elements work. Needless to say that was 6 hours I will never get back.
Did you know IKEA can send you replacement parts? Well I found that out! I stumbled through trying to figure out how to explain the stove insert (which has no replacement part), but they managed to figure it out and send me a new one! Crisis averted.
Here is where you can order replacements from IKEA.
I didn’t take enough pictures of the sink, but here is the step by step that I took and hopefully you will NEVER have to do:

Cut off the excess/broken plastic.
Measure the circumference of the sink and cut it down to the same height. I used so many tools to try and make this smooth, so I don’t have a specific tool recommendation for you.
I spray painted the inside and outside of the sink with matte black spray paint.
Because I had to cut the lip off of the sink, it no longer sat in the sink space of the countertop. I proceeded to duct tape the sink in place from the bottom and start the process of building up the sides of the sink to seal it. You don’t want to have any space in between because kids are likely to put water in the sink. I used this silicone sealant that came thankfully in black. I knew there was no way I’d be able to paint it afterwards, so I was happy I hadn’t gone with a different colour.
After 4-5 coats of silicone sealant from the top and then the bottom, I managed to make it look like it was purposeful rather than forced into it. I only did one coat from the bottom up, but the sealant seemed to hold well.
I finished by taping off the area and spraying it liberally with clear sealant (above).
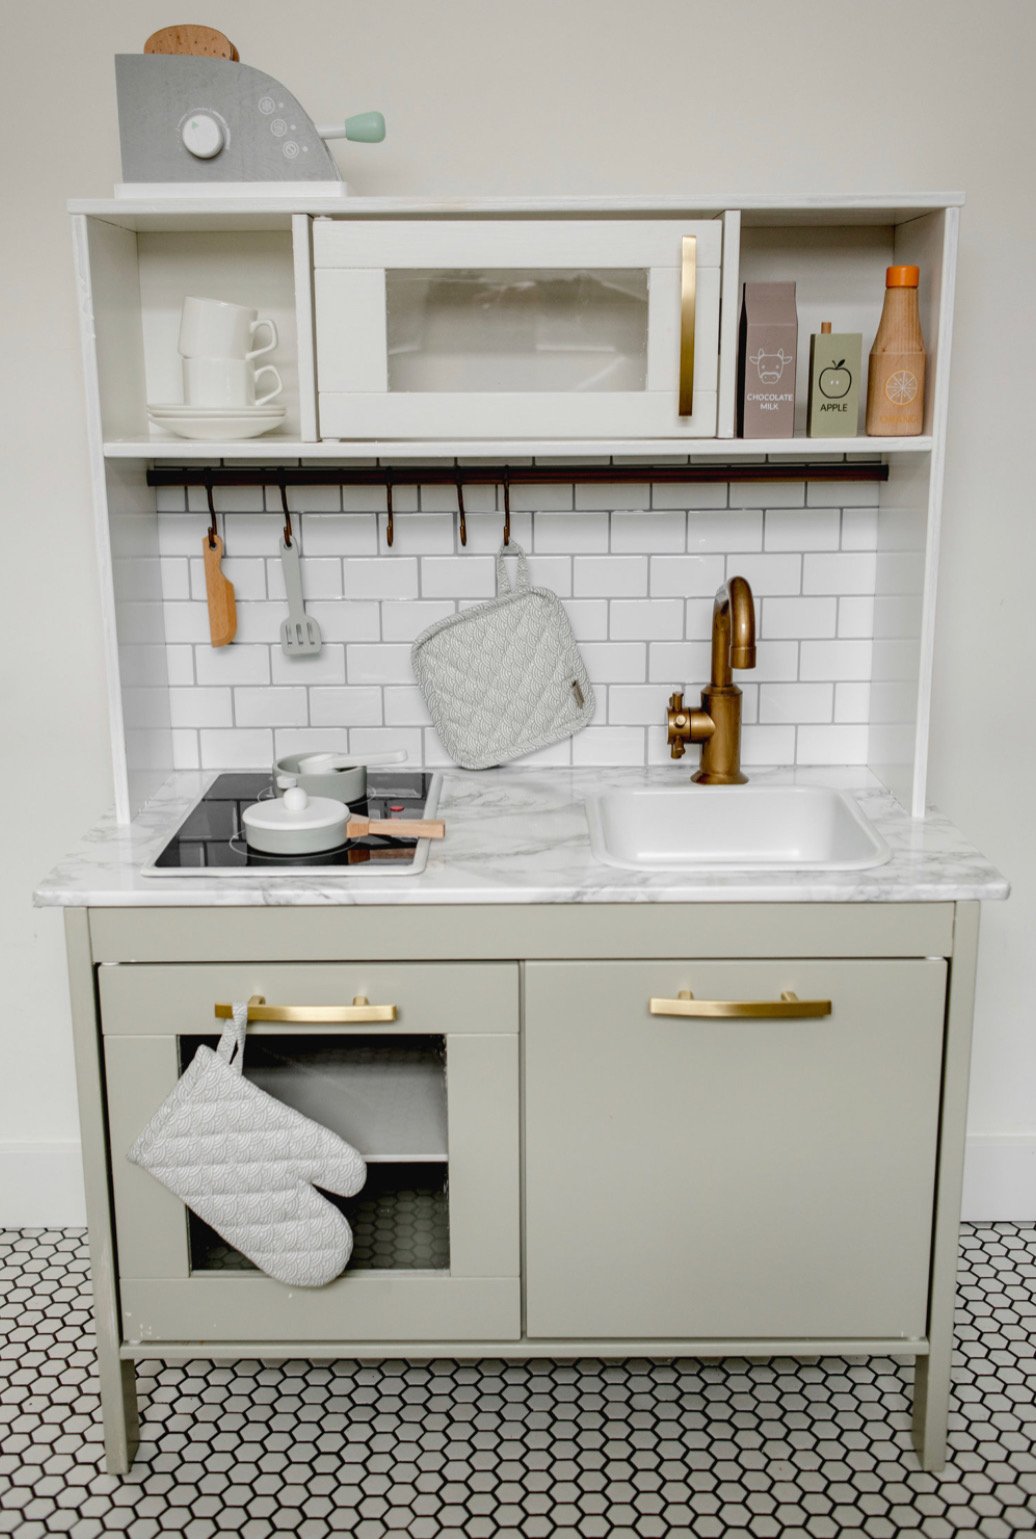
For the brass fixtures I used these ones from Home Depot for the handles and the oven knobs:
Richelieu Lambton Collection 3 3/4-inch for the Microwave
Richelieu Lambton Collection 5 1/16-inch for the Lower Cabinets
Richelieu Arezzo Collection 1 3/8 inch for the Oven Knobs
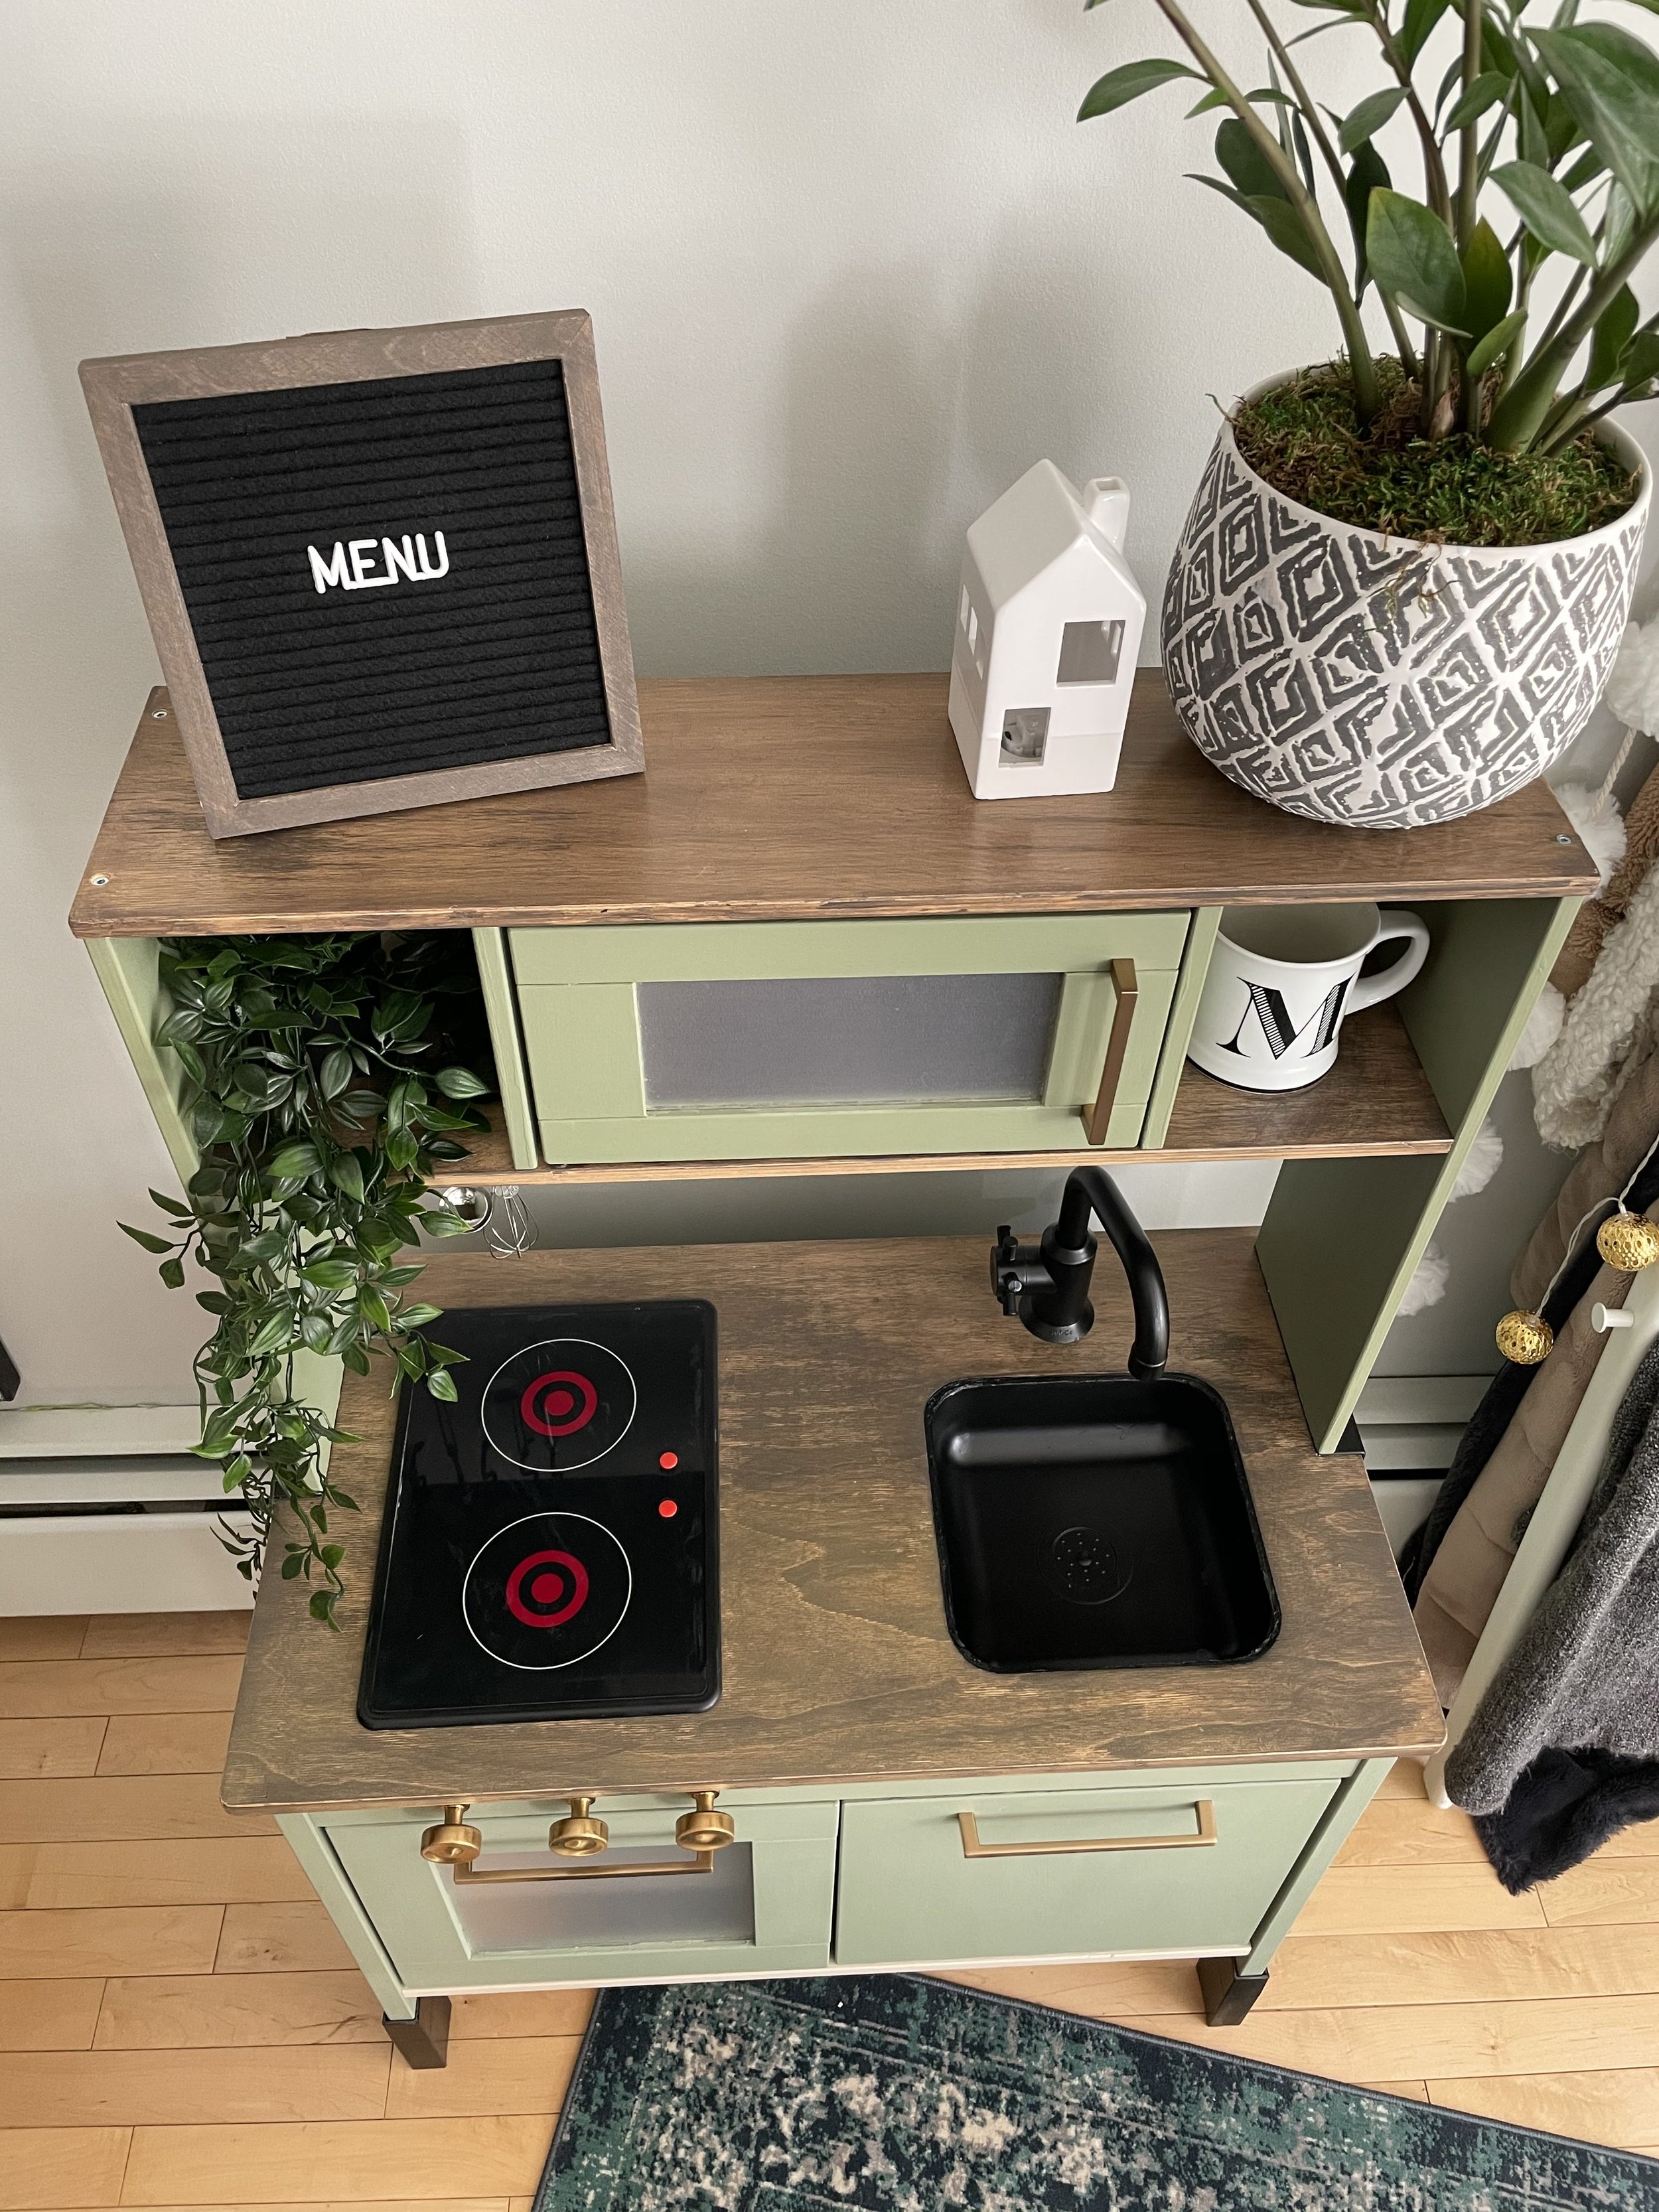
Final Product

Thanks for sticking around to read all about my project! I hope that you find inspiration from these pages and create your own. Ask away and let me know if I can help you with your IKEA kitchens!